How to Embed a 3D Viewer, Configurator & Customizer with iframe + postMessage (Quick 5-Minute Setup)

Introduction
Want to add 3D/AR previews and real-time product personalization to your store without months of coding? You can — with a secure iframe embed, postMessage handshake, and a short-lived session token created by your backend through the Alter Product Public API. This lets you embed a 3D Viewer, Configurator, or Customizer and build interactive shopping experiences that boost conversion, shorten checkout, and reduce returns.
This guide walks you through the updated custom-stack setup. You’ll see how to place the iframe, adjust URL parameters, initialize the embed session, connect cart events through postMessage, and keep API credentials secure on the server side. Works with modern CMS, storefront builders, and custom or headless e-commerce stacks.
Quick start: secure embed checklist
- Create a project in Alter Product.
- Generate API credentials in E-commerce Settings → API Credentials. Keep these credentials server-side only.
- Add your storefront domain in E-commerce Settings → Integration.
- Place the Viewer, Configurator, or Customizer URL inside an
iframe. - Handle the
postMessagehandshake: the iframe sendsALTER_CHILD_HELLO, your page replies withALTER_PARENT_ACK. - Create a short-lived embed session from your backend with
POST /public-api/v1/embed/session, then pass the token back to the iframe. - Listen for cart and data events such as
ALTER_VIEWER_ADD_TO_CART,ALTER_CONFIGURATOR_ADD_TO_CART, andALTER_CUSTOMIZER_ADD_TO_CART.
Tip: Real-time pricing is available in all plans. White-label branding, website embedding, branded Customizers, and server-side embedded storage are available from Business.

Step 1: Embed with iframe
Each module has its own URL. Add it to your page with an iframe, then authorize the runtime with the handshake and session token shown in Step 3. The iframe is the visual container; access is granted after your backend creates a valid embed session.
Viewer (3D/AR preview)
<iframe src="https://alterproduct.com/app/viewer/40?add_to_cart=1&nav=1" width="100%" height="640" title="Alter Product Viewer"></iframe>Configurator (variants + live price)
<iframe src="https://alterproduct.com/app/configurator/41?add_to_cart=1" width="100%" height="720" title="Alter Product Configurator"></iframe>Customizer (full personalization + print-ready)
<iframe src="https://alterproduct.com/app/customizer/44" width="100%" height="800" title="Alter Product Customizer"></iframe>Note: nav=1 can display your branded top bar when branding is available for your plan. On mobile, AR works in the Viewer or Configurator — no extra apps required.
Step 2: Styling & URL parameters
You can fine-tune the shopping experience by adding URL parameters to your iframe. Here are the most common ones:
nav=0|1— toggle the top navigation bar.add_to_cart=0|1— show or hide the “Add to Cart” button.bcg=value— set background mode or background value.env=1— select environment lighting.light_intensity=0–2— control light intensity.
For full tables of supported parameters see the documentation:
Finally, don’t forget to style the iframe container with CSS (aspect ratio, rounded corners, spacing) so your 3D models look comfortable and immersive. Make sure it also matches the overall look & feel of your site — consistent styling reinforces your brand and keeps the experience seamless for shoppers.
Step 3: Integrate with postMessage (Viewer, Configurator, Customizer)
postMessage lets your page talk to the embedded module and vice versa. The current runtime starts with a nonce handshake, then asks your page for a session token. Your frontend should never call Alter Product Public API with private credentials directly — create a small backend endpoint that calls the Public API server-to-server.
Note: Always validate event.origin to accept messages only from the trusted source.
Viewer — handshake, session token and cart events
<iframe
  id="viewerWidget"
  src="https://alterproduct.com/app/viewer/1?add_to_cart=1&nav=1"
  title="Alter Product Viewer"
  width="100%"
  height="560"
  style="border:0;border-radius:12px;"
  loading="lazy"></iframe>

<script>
  const ALLOWED_ORIGIN = "https://alterproduct.com";
  const viewer = document.getElementById("viewerWidget");

  async function createEmbedSession(payload) {
    const response = await fetch("/api/alter/embed-session", {
      method: "POST",
      headers: { "Content-Type": "application/json" },
      body: JSON.stringify({
        tool: "viewer",
        origin: window.location.origin,
        runtimePayload: payload
      })
    });

    if (!response.ok) throw new Error("Could not create embed session");
    return response.json(); // expected: { token }
  }

  function requestViewerData() {
    viewer.contentWindow.postMessage(
      { type: "ALTER_VIEWER_GET_PRODUCT_DATA" },
      ALLOWED_ORIGIN
    );
  }

  window.addEventListener("message", async (event) => {
    if (event.origin !== ALLOWED_ORIGIN) return;

    const { type, payload } = event.data || {};

    if (type === "ALTER_CHILD_HELLO") {
      viewer.contentWindow.postMessage(
        { type: "ALTER_PARENT_ACK", payload: { nonce: payload?.nonce } },
        ALLOWED_ORIGIN
      );
      return;
    }

    if (type === "ALTER_TOOL_INIT_SESSION") {
      try {
        const session = await createEmbedSession(payload);
        viewer.contentWindow.postMessage(
          { type: "ALTER_TOOL_SESSION_READY", payload: { token: session.token } },
          ALLOWED_ORIGIN
        );
      } catch (error) {
        viewer.contentWindow.postMessage(
          { type: "ALTER_TOOL_SESSION_ERROR", payload: { message: error.message } },
          ALLOWED_ORIGIN
        );
      }
      return;
    }

    if (type === "ALTER_VIEWER_ADD_TO_CART") {
      console.log("[Viewer] ADD_TO_CART", payload);
      // TODO: add product data to your cart
    }

    if (type === "ALTER_VIEWER_DATA_RESPONSE") {
      console.log("[Viewer] DATA_RESPONSE", payload);
      // TODO: update price / variant UI
    }
  });
</script>
Configurator — handshake, session token and product data
<button id="getDataBtn">Get Configured Product</button>

<iframe
  id="configuratorWidget"
  src="https://alterproduct.com/app/configurator/1?nav=0&add_to_cart=1"
  title="Alter Product Configurator"
  width="100%"
  height="600"
  style="border:0;border-radius:12px;"
  loading="lazy"></iframe>

<script>
  const ALLOWED_ORIGIN = "https://alterproduct.com";
  const iframe = document.getElementById("configuratorWidget");

  async function createEmbedSession(payload) {
    const response = await fetch("/api/alter/embed-session", {
      method: "POST",
      headers: { "Content-Type": "application/json" },
      body: JSON.stringify({
        tool: "configurator",
        origin: window.location.origin,
        runtimePayload: payload
      })
    });

    if (!response.ok) throw new Error("Could not create embed session");
    return response.json(); // expected: { token }
  }

  document.getElementById("getDataBtn").addEventListener("click", () => {
    iframe.contentWindow.postMessage(
      { type: "ALTER_CONFIGURATOR_GET_PRODUCT_DATA" },
      ALLOWED_ORIGIN
    );
  });

  window.addEventListener("message", async (event) => {
    if (event.origin !== ALLOWED_ORIGIN) return;

    const { type, payload } = event.data || {};

    if (type === "ALTER_CHILD_HELLO") {
      iframe.contentWindow.postMessage(
        { type: "ALTER_PARENT_ACK", payload: { nonce: payload?.nonce } },
        ALLOWED_ORIGIN
      );
      return;
    }

    if (type === "ALTER_TOOL_INIT_SESSION") {
      try {
        const session = await createEmbedSession(payload);
        iframe.contentWindow.postMessage(
          { type: "ALTER_TOOL_SESSION_READY", payload: { token: session.token } },
          ALLOWED_ORIGIN
        );
      } catch (error) {
        iframe.contentWindow.postMessage(
          { type: "ALTER_TOOL_SESSION_ERROR", payload: { message: error.message } },
          ALLOWED_ORIGIN
        );
      }
      return;
    }

    if (type === "ALTER_CONFIGURATOR_ADD_TO_CART") {
      console.log("[Configurator] ADD_TO_CART", payload);
      // TODO: add item to your cart
    }

    if (type === "ALTER_CONFIGURATOR_DATA_RESPONSE") {
      console.log("[Configurator] DATA_RESPONSE", payload);
      // TODO: show summary / sync price & variant
    }
  });
</script>
Customizer — session token, cart key and order-first flow
In the Customizer, clicking Add to cart saves the customer design and creates an order in the editable cart flow. The default editable status is shopping_cart. Customers can keep editing while the order is shopping_cart or editable. Once you move the order to fulfillment statuses such as paid, processing, completed or cancelled, customer editing is locked.
<iframe
  id="customizerWidget"
  src="https://alterproduct.com/app/customizer/1?add_to_cart=1"
  title="Alter Product Customizer"
  width="100%"
  height="720"
  style="border:0;border-radius:12px;"
  loading="lazy"></iframe>

<script>
  const ALLOWED_ORIGIN = "https://alterproduct.com";
  const customizer = document.getElementById("customizerWidget");

  async function createCustomizerSession(payload) {
    const response = await fetch("/api/alter/customizer-session", {
      method: "POST",
      headers: { "Content-Type": "application/json" },
      body: JSON.stringify({
        origin: window.location.origin,
        runtimePayload: payload
      })
    });

    if (!response.ok) throw new Error("Could not create Customizer session");
    return response.json(); // expected: { token, cartKey, mode }
  }

  window.addEventListener("message", async (event) => {
    if (event.origin !== ALLOWED_ORIGIN) return;

    const { type, payload } = event.data || {};

    if (type === "ALTER_CHILD_HELLO") {
      customizer.contentWindow.postMessage(
        { type: "ALTER_PARENT_ACK", payload: { nonce: payload?.nonce } },
        ALLOWED_ORIGIN
      );
      return;
    }

    if (type === "ALTER_CUSTOMIZER_INIT_SESSION") {
      try {
        const session = await createCustomizerSession(payload);
        customizer.contentWindow.postMessage(
          {
            type: "ALTER_CUSTOMIZER_SESSION_READY",
            payload: {
              token: session.token,
              cartKey: session.cartKey,
              mode: session.mode
            }
          },
          ALLOWED_ORIGIN
        );
      } catch (error) {
        customizer.contentWindow.postMessage(
          { type: "ALTER_CUSTOMIZER_SESSION_ERROR", payload: { message: error.message } },
          ALLOWED_ORIGIN
        );
      }
      return;
    }

    if (type === "ALTER_CUSTOMIZER_ADD_TO_CART") {
      console.log("[Customizer] ADD_TO_CART", payload);
      // TODO: store order/cart data and redirect to checkout
    }

    if (type === "ALTER_CUSTOMIZER_UPDATE_DESIGN") {
      console.log("[Customizer] UPDATE_DESIGN", payload);
      // TODO: update existing cart line/order data
    }
  });
</script>
Docs: detailed message lists & payloads:
Tip: Always add your domain in E-commerce Settings → Integration, validate event.origin, and avoid using * as the target origin in production.
What you get: A current configuration or design payload — variant, price, quantity, metadata, cart key or order data — ready to sync with your cart or summary.
Step 4: Add to Cart flows
- Viewer:
ALTER_VIEWER_ADD_TO_CARTsends product data when users click the button. Use it to add the selected product state to your cart. - Configurator:
ALTER_CONFIGURATOR_ADD_TO_CARTsends configured product data, including selected variant metadata and pricing context. - Customizer:
ALTER_CUSTOMIZER_ADD_TO_CARTfires after the design is saved in the editable cart flow. This is the moment to:- store the order ID or cart data,
- store the
cartKeyif your flow needs it, - redirect to checkout,
- update status through the Public API after payment to lock customer editing.
Step 5: Security & compliance
- Add your embedding domain in E-commerce Settings → Integration.
- Always filter
event.originand never use*in production. - Keep API credentials on your backend only. Public API calls that require authentication are server-to-server.
- Create embed sessions through your backend with
POST /public-api/v1/embed/session. - Use short-lived session tokens. Embed session tokens are scoped to the validated origin and expire automatically.
- White-label options (logo, colors, branded nav) are available from Business.
Step 6: Test & debug
- Open DevTools → Console to monitor
postMessagelogs. - Check that
ALTER_CHILD_HELLOis received and that your page sendsALTER_PARENT_ACKwith the same nonce. - Verify that your backend endpoint creates a valid embed session token.
- Test variant changes, product data requests and Add to Cart flows.
- On mobile, test AR with the Viewer or Configurator.
- If nothing shows — check domain allowlisting, session token creation, and
event.originvalidation.
Optional: Public API for embed sessions and Customizer orders
For deeper workflows, connect your backend with Alter Product’s Public API. Typical use cases:
- create an embed session token with
POST /public-api/v1/embed/session, - fetch an order by ID,
- fetch multiple orders in one request,
- update status after payment,
- sync quantities,
- delete abandoned orders,
- fetch products available for the authenticated storefront.
All authenticated Public API requests should run server-to-server. This gives you a smooth pipeline: design → cart → payment → production with print-ready exports.
Common mistakes (to avoid)
- No embed session token — the iframe cannot initialize securely.
- Calling authenticated Public API endpoints directly from the browser — API credentials must stay server-side.
- No
ALTER_PARENT_ACKresponse or mismatched nonce — handshake fails. - No
event.originfilter — opens security risks. - Domain not added in E-commerce Settings → Integration — session or messaging can fail.
- Iframe too small — cramped 3D view (increase height, add radius).
- Forgot
add_to_cart=1— button doesn’t appear.
FAQ
Can I embed on any CMS/site?
Yes — the UI is embedded with an iframe. For production custom-stack integrations, use the postMessage handshake and create a short-lived embed session token from your backend.
Is real-time pricing included in every plan?
Yes — it updates instantly across all plans.
Do I need a developer?
For a secure custom-stack cart integration, you need a small backend endpoint to create embed sessions and keep API credentials private. The frontend part is still lightweight: iframe plus postMessage.
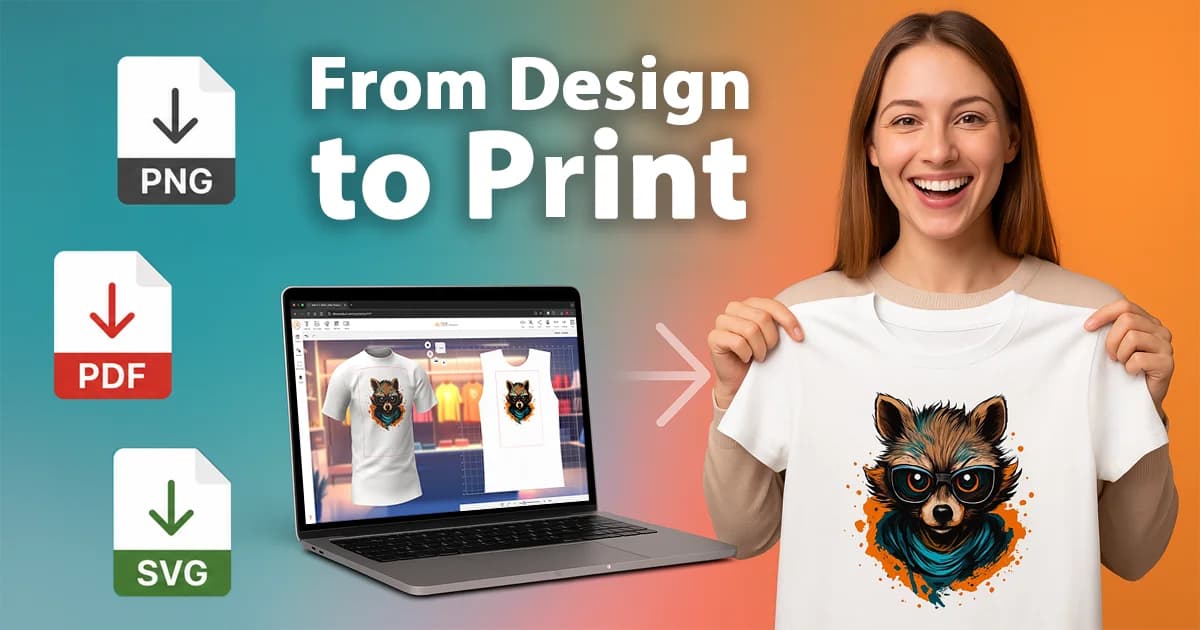
Does the Customizer generate print-ready files?
Yes — the Customizer can export print-ready files, available starting from the Personal plan.
Can I use my own logo and colors?
Yes — white-label branding is available from Business.