Your storage · WordPress + WooCommerce
WooCommerce AWS S3
The Alter Product plugin includes a ready-made AWS S3 storage module. Keep supported plugin file groups in your own private bucket, connect it in WordPress and migrate existing files with the plugin’s tools.
Alter Product does not charge an additional storage-capacity fee for expanding this connected storage. AWS bills your account for storage, requests and transfer. Your WordPress hosting and the usual plan and embed-session rules still apply.
The instructions follow the setup guide in the plugin. AWS console labels stay in English.
Storage, delivery and costs
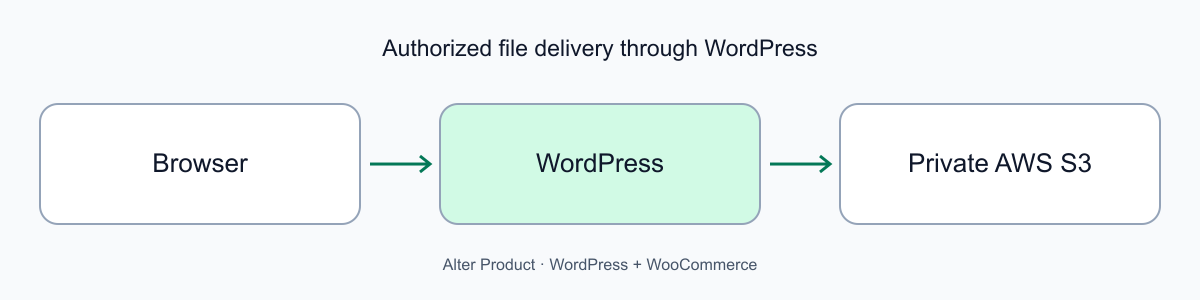
S3 stores the plugin’s file objects. WordPress remains responsible for authorized delivery to the browser.
A private backend for the plugin
The browser does not download directly from S3. WordPress fetches and verifies files from the private bucket, then serves them through its own endpoints. Keep S3 CORS empty and Block Public Access enabled; this is not a public bucket or a direct CDN connection.
The module covers supported Alter Product file groups. Connecting a bucket does not move every file in WordPress or change limits on embedded tools.
Pay AWS for the resources you use
There is no extra Alter Product charge for increasing storage capacity in your connected bucket. AWS charges depend on usage, region and storage class; check the current S3 price list instead of assuming a fixed rate.
Because WordPress serves the files, traffic can also count toward your hosting bandwidth. S3 is not a promise of zero hosting transfer or unlimited server throughput. Transfer includes files and shared models downloaded from Alter. JS/CSS/WASM does not reduce your transfer allowance. Your files served from your own hosting or S3 are excluded.
Create a bucket with the supported settings
The field names below match the English AWS console and the setup guide built into the plugin.
Create a general-purpose bucket
Sign in to AWS, open Amazon S3 and select General purpose buckets → Create bucket. Choose a region and a name using lowercase letters, numbers and hyphens, without dots. Copy the full bucket name, including any suffix added by AWS.
- Apply the settings in the table and choose Create bucket.
- Keep the full bucket name, region and 12-digit AWS account ID of the bucket owner.
- Leave Cross-origin resource sharing (CORS) empty. Requests to S3 come from the WordPress server.
| AWS field | Setting |
|---|---|
| Bucket type | General purpose |
| Bucket namespace | Account Regional namespace (recommended) |
| Object Ownership | ACLs disabled / Bucket owner enforced |
| Block Public Access | Block all public access (all four settings) |
| Bucket Versioning | Enable |
| Default encryption | Server-side encryption with Amazon S3 managed keys (SSE-S3 / AES256) |
| Bucket Key | Disable |
| Advanced settings → Object Lock | Disable |
Require HTTPS
Add a transport rule without making the bucket public or granting object access.
Add the bucket policy
Open Permissions → Bucket policy → Edit. Replace both EXAMPLE-BUCKET values with your full bucket name. If a policy already exists, retain its statements and add this rule after reviewing the complete document.
- Check the editor messages and choose Save changes.
- Confirm that the rule was saved. Keep Block all public access enabled.
{
  "Version": "2012-10-17",
  "Statement": [
    {
      "Sid": "DenyInsecureTransport",
      "Effect": "Deny",
      "Principal": "*",
      "Action": "s3:*",
      "Resource": [
        "arn:aws:s3:::EXAMPLE-BUCKET",
        "arn:aws:s3:::EXAMPLE-BUCKET/*"
      ],
      "Condition": {
        "Bool": {
          "aws:SecureTransport": "false",
          "aws:PrincipalIsAWSService": "false"
        }
      }
    }
  ]
}Create restricted IAM access
Use a dedicated policy for this bucket and prefix, rather than AdministratorAccess or AmazonS3FullAccess.
Create the plugin policy
In IAM → Policies → Create policy → JSON, paste the following document. Replace every EXAMPLE-BUCKET with the full bucket name. The prefix alter-product must match Folder prefix in WordPress; change it in every object Resource if you choose a different prefix.
- Validate the policy, choose Next and give it a name such as AlterProductS3Storage.
- Choose Create policy and keep its name for the user setup.
{
  "Version": "2012-10-17",
  "Statement": [
    {
      "Sid": "ReadRequiredBucketControls",
      "Effect": "Allow",
      "Action": [
        "s3:GetBucketVersioning",
        "s3:GetBucketOwnershipControls",
        "s3:GetBucketPublicAccessBlock",
        "s3:GetEncryptionConfiguration"
      ],
      "Resource": "arn:aws:s3:::EXAMPLE-BUCKET"
    },
    {
      "Sid": "WriteAndReadVersionedPluginObjects",
      "Effect": "Allow",
      "Action": [
        "s3:PutObject",
        "s3:GetObjectVersion"
      ],
      "Resource": [
        "arn:aws:s3:::EXAMPLE-BUCKET/alter-product/objects/*",
        "arn:aws:s3:::EXAMPLE-BUCKET/alter-product/.storage-tests/*"
      ]
    },
    {
      "Sid": "RecoverJournalOwnedObjects",
      "Effect": "Allow",
      "Action": "s3:GetObject",
      "Resource": "arn:aws:s3:::EXAMPLE-BUCKET/alter-product/objects/*"
    },
    {
      "Sid": "DeleteOnlyConnectionTestVersions",
      "Effect": "Allow",
      "Action": "s3:DeleteObjectVersion",
      "Resource": "arn:aws:s3:::EXAMPLE-BUCKET/alter-product/.storage-tests/*"
    }
  ]
}Create a dedicated user and access key
Choose IAM → Users → Create user. Leave Provide user access to the AWS Management Console unchecked.
- Choose Next → Attach policies directly and attach only the policy above. Complete Create user.
- Open that user’s Security credentials → Access keys → Create access key. For this manual plugin setup, choose Other → Next, then Create access key.
- Save the Access key ID and Secret access key in a password manager. The secret is displayed only once. Enter them directly into WordPress over HTTPS, not into messages or screenshots.
Save and test the WordPress connection
Open Alter Product → Settings → Storage in the store’s HTTPS dashboard. Choose AWS S3 and + / Add connection.
Enter the connection details
Select New connection. The same built-in instructions are available under AWS S3 setup guide.
- Choose Save connection and wait for confirmation.
- Choose Test connection. Save any edits before testing again.
- Check the result in the dialog and Last connection test column. Empty key fields after saving are intentional.
| Field | Value |
|---|---|
| Bucket name | Full bucket name, not an ARN, s3:// URL or HTTPS address; no dots. |
| Folder prefix | alter-product, matching the IAM policy. Use letters, numbers, hyphens, underscores and separated folders; no leading or trailing slash. |
| Bucket owner AWS account ID | The owner’s 12-digit account ID, without spaces. |
| AWS region | The actual bucket region. The form defaults to eu-central-1. |
| AWS access key ID / AWS secret access key | The dedicated IAM user’s saved key pair. |
| Use temporary AWS credentials | Leave unchecked for this IAM user’s long-term key. Enable only for temporary credentials and supply the AWS session token. |
If the connection test fails
Verify the bucket name, owner, region, required bucket settings and the exact prefix in both WordPress and IAM. Keep CORS empty; do not disable public-access protection.
Saved bucket, prefix, owner and region identify the connection. For a different destination, select New connection. Edit → Reconnect is for replacing credentials while keeping the same saved file references.
Provide support with the test result, without access keys. A successful connection test is required before choosing this S3 as the default.
Choose the default and migrate existing files
The default destination and migration are separate actions.
Use S3 for new groups
Choose Make default in the saved connection’s row. The plugin tests the connection and changes the default only after success. This applies to new file groups; existing groups and later revisions keep their recorded destination until migrated.
Move supported existing groups
Back up the database, WordPress salts and files together before the first migration. Start with a test environment or a small group. Open Migrate on the target S3 row; opening the panel alone does not copy files.
Auto migration covers supported groups outside the chosen destination. It does not promise to migrate unrelated WordPress files.
- Choose Start migration. The plugin tests S3, prepares each group, copies it, verifies it and switches its references.
- Keep the page open. Pause stops after the current group; Resume migration continues saved progress. After closing the page, reopen it to resume dispatching work.
- If a group fails, inspect the message and Advanced, correct the cause and resume. Do not blindly repeat an operation whose upload result is unknown.
- After Migration completed, test normal asset reading, editing, previews and order-file access. New groups created during the scan may need another pass.
Removing a row does not delete stored files
Switch the default first if needed. Remove retires the connection from the list, while existing files and their saved credentials remain available. It is not an AWS object cleanup command.
Share storage across WordPress nodes
A shared S3 destination can reduce dependence on one node’s file disk. A load balancer still needs a correctly shared WordPress installation.
Requirements for several nodes
For one WordPress installation behind a load balancer, provide all of these together:
- One consistent SQL writer and shared plugin database state.
- A shared uploads directory for files still stored locally and retained migration sources.
- The same original WordPress salts on every node so saved credentials and encrypted files remain readable.
- A private temporary directory per node for transfer work.
- Consistent plugin configuration and access to the same private S3 bucket and object versions.
- Use standard wpdb with native mysqli and InnoDB tables. Database routing drop-ins such as HyperDB are not supported; load balancing here is at the HTTP level.
Keep recovery and key rotation working
Preserve the database, salts and referenced file versions together.
Back up, reconnect and verify
Use Edit → Reconnect to replace credentials for the same saved connection. Test current and historical file reads before retiring the old key, including other saved connections that may still use it.
Keep S3 versioning enabled and retain versions referenced by the plugin. Do not apply a lifecycle cleanup that deletes required historical versions. Test restoring the database, salts and stored files together.
Temporary credentials expire and require a new valid token and keys; the plugin does not renew them automatically. Monitor AWS usage and hosting transfer as the store grows.