Viewer: view the product
Present a 3D model and its appearance. Useful when the priority is showing the product from different angles without offering print editing.
E-commerce integration - from design to order
Add 3D product views, variant configuration and product personalization to your own website. Customers view products, choose options and create designs in your store, while you manage your catalog and orders in your own system.
Choose the WordPress plugin with WooCommerce installed to complete setup without writing integration code. If you develop your own website or store, connect the embedded tools to your backend and cart through the Public API and postMessage events.
Illustrations show the actual interface from recordings and the plugin admin panel. Button labels in the images are in English; the tool's appearance depends on the store configuration.



Prepare the same product design for viewing, configuration or print editing. Choose an integration approach that fits your website and the development work you want to undertake.
The plugin provides ready-made WordPress and WooCommerce functionality. The API lets you build a custom connection to another platform, a headless application or an existing order management system.
| Area | WordPress + WooCommerce | Your system through the API |
|---|---|---|
| Getting started | Plugin installation and connection wizard in WordPress. | Implementing the backend connection and embedding tools on your website. |
| Products and variants | Assigning a design to a WooCommerce product and synchronizing variants. | Mapping product identifiers and options to your own store data. |
| Cart and orders | Built-in handling of configurations, customer designs and previews in WooCommerce. | Handling embedded tool events and order synchronization in your own system. |
| Files and assets | Local library, designs and order files on your WordPress server. | Data storage and access according to the selected integration mode. Using your own storage requires you to implement its handling. |
Choose the tool based on what customers need to do on your website. Prepare the design and personalization rules in Designer beforehand.
Present a 3D model and its appearance. Useful when the priority is showing the product from different angles without offering print editing.
Choose from predefined product options, such as size, color or material. Customers see changes on the model and send their configuration to the cart.
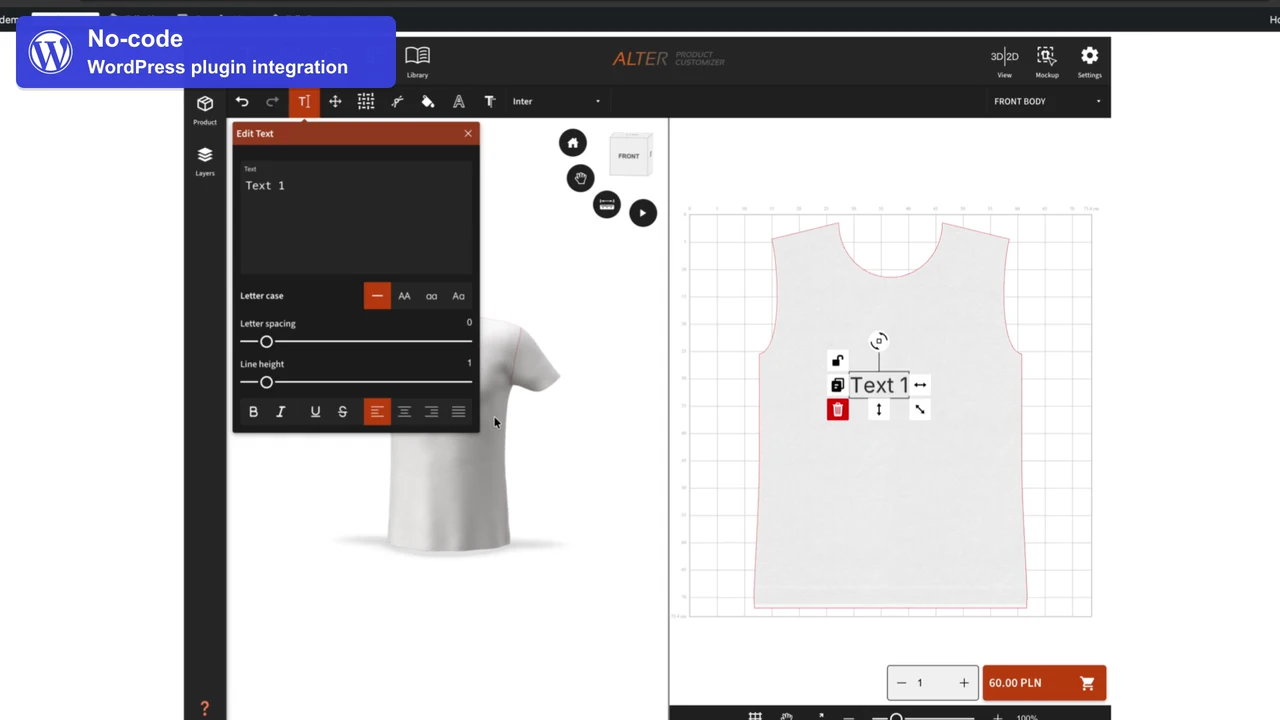
Personalize products with the tools, graphics, text and templates you make available. The saved customer design is linked to a cart or order item.
The store owner's workspace. Prepare compositions, variants, print areas and customer tool settings here. Access to administrative editing is separate from shopping in the store.
Alter Product is a WordPress plugin. Store integration requires WooCommerce to be installed and active. Complete a typical setup in the admin panel without building your own API and cart handling.
Embedding Alter Product on your own website requires an active Business subscription or a higher plan that includes this feature. This applies to both the WordPress + WooCommerce plugin and custom API integrations. Personal FREE and Personal plans do not include embedding in your store.
For the plugin approach, you need WordPress with WooCommerce installed and active, plus an Alter Product account. Hosting files yourself does not replace the required subscription: Alter Product still provides the application and authorizes its launch.
Alter Product runs inside an iframe embedded in your store. Browsers restrict access to some features used by the application when the page does not provide a secure context. HTTPS encrypts the connection, and a valid certificate lets the browser verify the domain.
The browser also checks the page surrounding the iframe. An HTTPS address for the Alter Product application is therefore not enough if the store runs over HTTP. Your page embedding the tool must also use HTTPS. This follows browser security rules for embedded applications.
Automatic connection guides you through Alter Product account authorization and store setup. You do not need to transfer API keys manually with this approach.
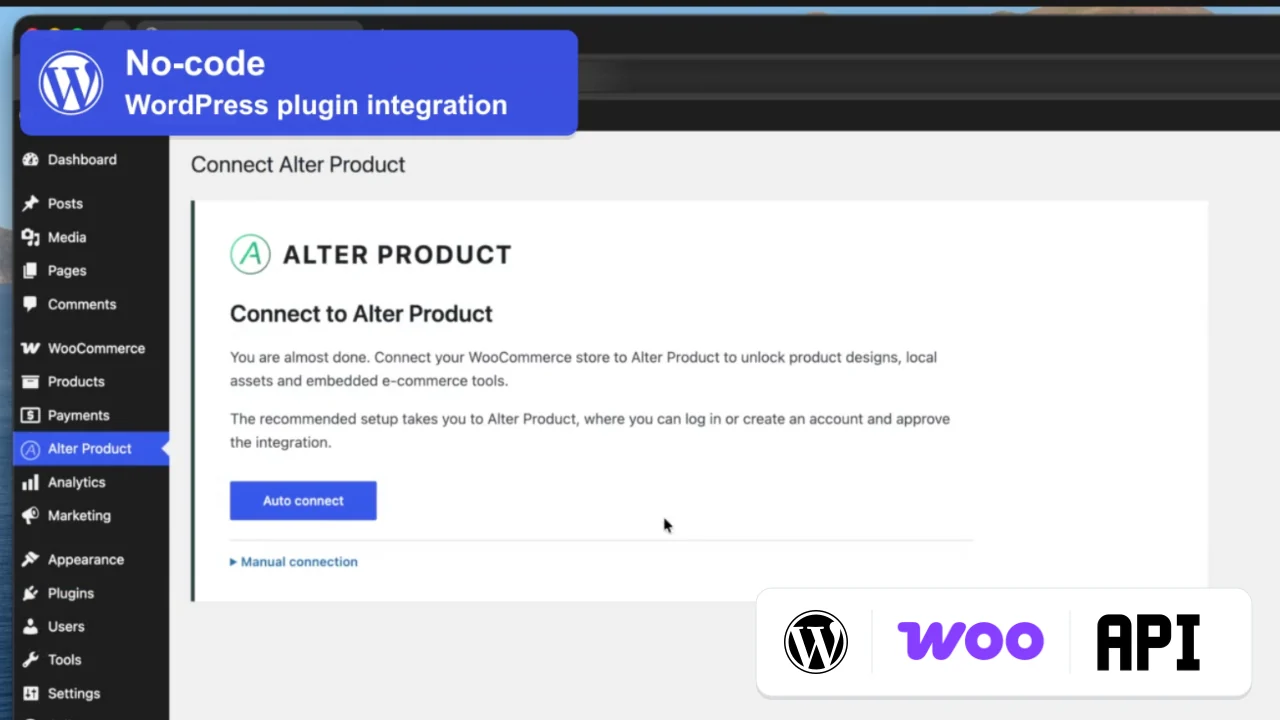
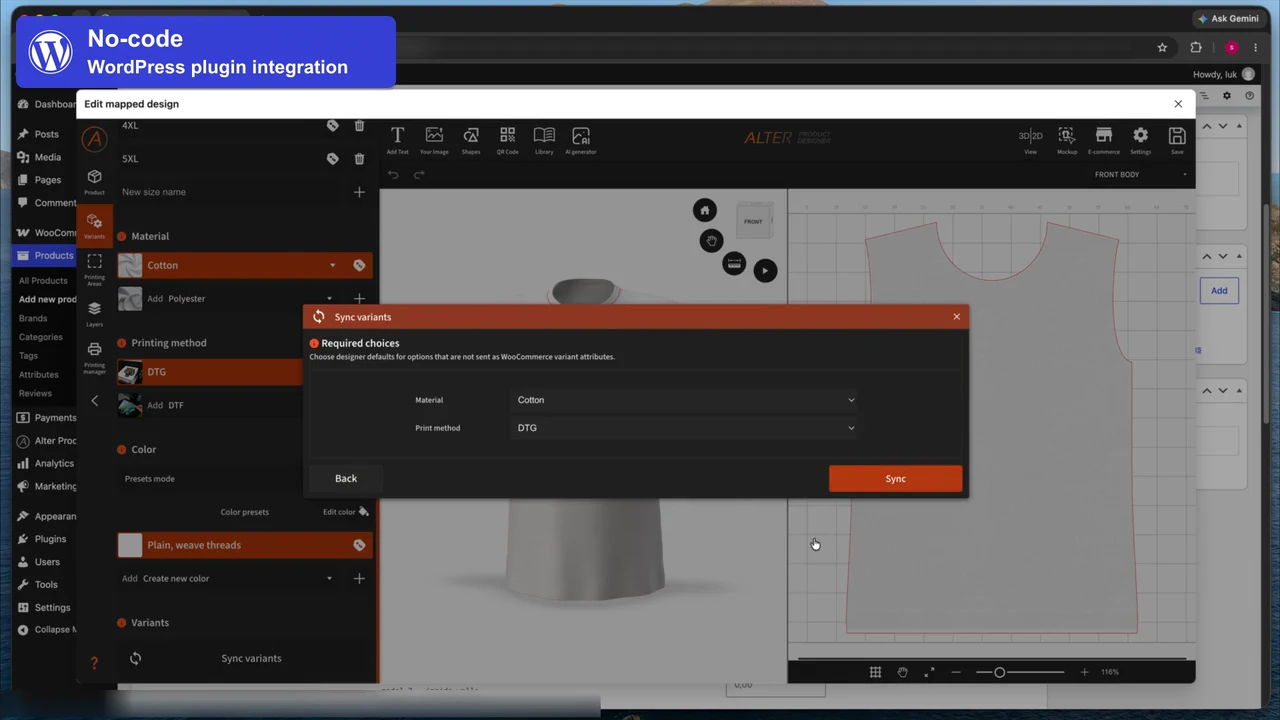
In the WooCommerce product editor, open the Alter Product tab. Create a new design or choose an existing one, then open Designer. Set the artwork, available options and print areas for this product.
Store models, designs, graphics and order files on the hosting that runs your WordPress site. Assets added locally serve your store and do not thereby become entries in the public Alter Product library for other stores.
The plugin saves model, library, design, mockup and order files in your WordPress storage. Generator project data and revisions are also saved in that installation's database.
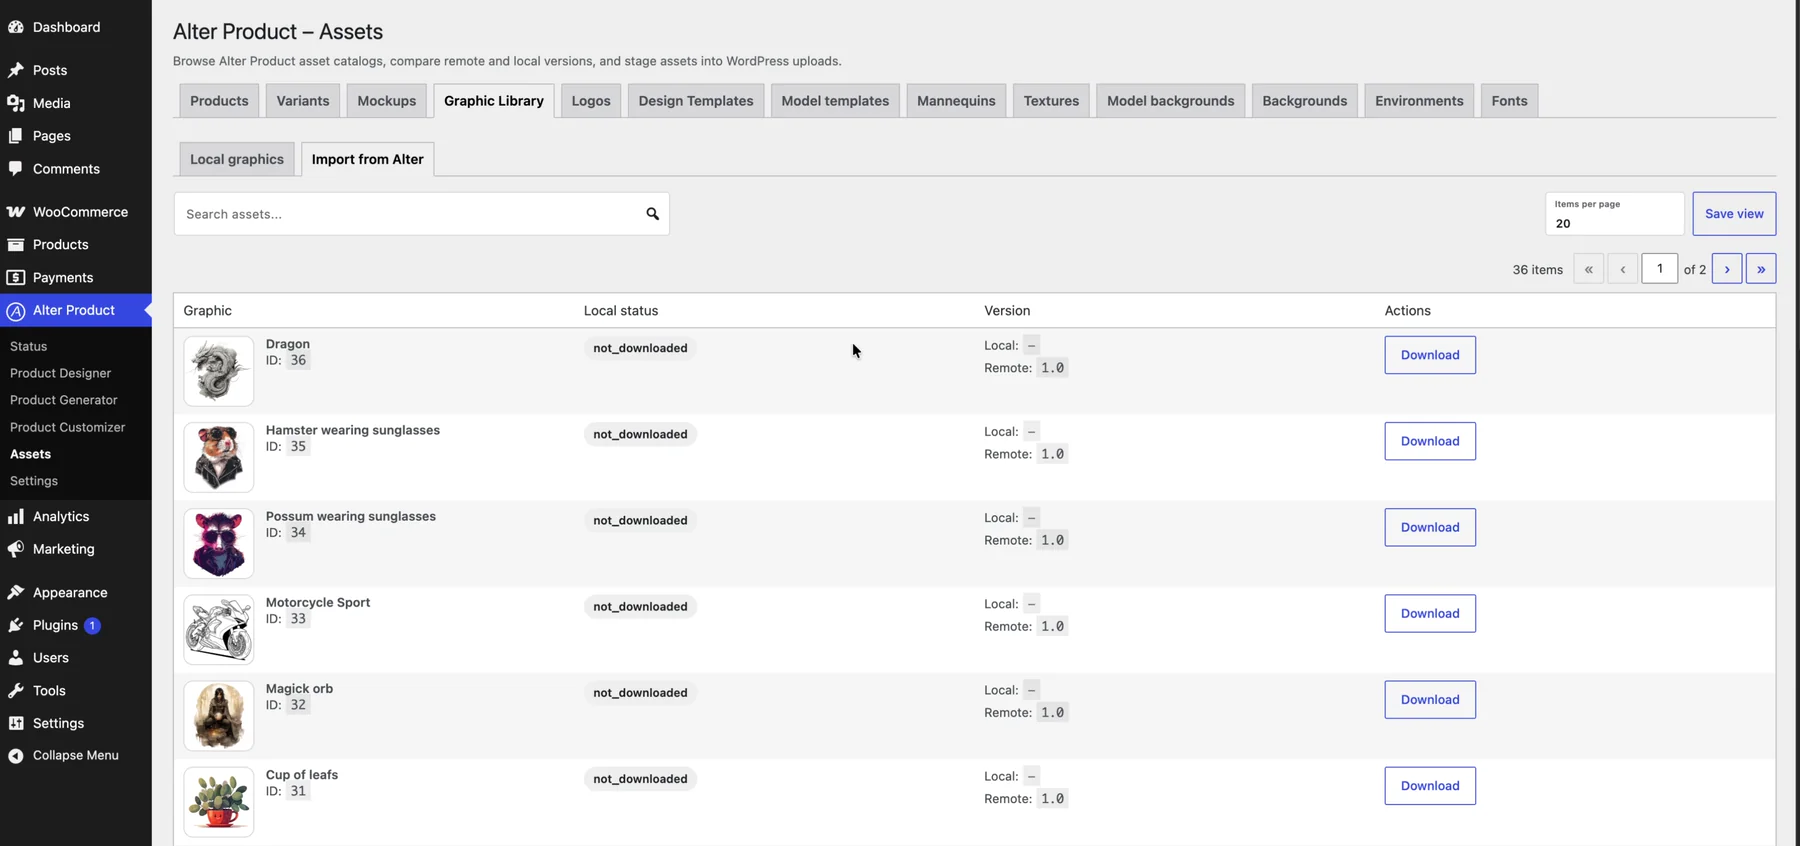
Add your own materials and import selected assets from Alter Product. After downloading, you use a local copy. Importing, checking for updates and downloading new versions are separate actions.
| Admin area | What you do there |
|---|---|
| Assets | Manage models, graphics, templates, backgrounds, logos, textures, environments and more. The available ways to add assets depend on the asset type. |
| Model Generator | Create local projects from templates and work with models linked to the generator. |
| Product Designs / Designer | Prepare or import a design, edit it and assign it to a store product. |
| WooCommerce Orders | Use saved customer designs, previews and files needed to fulfill the order. |
You host the assets, while the tool interface loads from Alter Product inside an iframe. The Alter Product service checks account access, the plan and sessions, and supplies the import catalog. Integration requires a connection to this service.
Back up the database, file directory and WordPress keys and salts needed to read the plugin's encrypted data. This lets you restore not only visible graphics but also the data needed to continue working.
Embed a tool in a product page or a separate WordPress page. Customers stay within your store's shopping flow, while WooCommerce handles the cart and order.
Choose a display method that fits your store: a tool on the product page, a button leading to a dedicated page, or embedding through the available blocks and shortcodes. Viewer, Configurator and Customizer serve different purposes, so you do not need to offer all of them at once.
Adapt product presentation to your brand. Manage local backgrounds, logos and embedded tool appearance settings in the plugin. Individual options depend on your plan.
Customers choose a variant and personalize the product. The plugin links the configuration and saved design to the cart item and later to the WooCommerce order. Available mockups help identify the ordered print.
Connecting your store to 3D tools is the start of the process. Download files from the prepared design for your own production or use the plugin's print-on-demand provider integration.
Configure a connection to your chosen provider in the plugin settings. Then map the product, variants and print placements to the provider's catalog, prepare the files and submit the WooCommerce order for fulfillment.


Configure your own connection to an AI provider and use available image generation or enhancement features while working on a design. Plugin requests go from WordPress to the selected provider and are billed to your account with that provider.
A session is temporary authorization to open a specific tool in your store. It helps provide secure customer access to products and is counted toward the monthly embedding session limit. It is not the same as a single click, a unique visitor or an order.
When an embedded tool launches, the integration obtains a short-lived token, also called a session key. Permanent account credentials stay on the server. Customers do not need to copy keys or sign in to the owner's Alter Product account.
The default token validity in the current implementation is 15 minutes. The server can specify a different duration, so the integration uses the expiry time of the session it receives. Reusing a token does not extend that expiry. A new session is required for another authorization after it expires.
This depends on the tool and whether it still has a suitable, valid session. The plugin does not share one session across all visitors and products. The rules below describe its current behavior.
| Situation | What happens to the session? | Effect on the limit |
|---|---|---|
| First tool launch without a matching session | The integration requests a new token for the tool and product context. | Successfully issuing a new token uses one session. |
| Rotating the model, changing a color or editing text in the open tool | Work continues within the launched session. | These actions do not in themselves issue additional tokens. |
| Full page refresh with Viewer or Configurator | The plugin usually obtains a new token after the page reloads. These tools do not retain their session memory across full page refreshes. | Another successful token issuance uses another session. |
| Refreshing Customizer in the same tab | Customizer may reuse a saved session if it matches the store, product, order and operating mode and is not close to expiry. | Reuse does not increase the counter. If the conditions are not met, a new session is needed. |
| Token expiry, a different product or a changed working context | New authorization and a new token may be required. Browser storage availability also affects whether a session can be reused. | A newly issued token increases usage of the limit. |
The counter increases when the API successfully issues a new token. Using an already issued, valid token is not another issuance. When choosing a plan, account for tool launches, refreshes and reopenings, rather than only orders or visitors.
Embedded tools within the same store share a monthly session limit. The counter is tracked separately for each store, by calendar month in UTC. New embedded Designer and Model Generator sessions in the WordPress admin panel also increase this counter. Simply downloading an available model through the import API does not open an editor session.
Once the limit is reached, the system refuses to issue further sessions. This is a subscription usage limit; check your plan for the current allowance.
Have a custom store, headless application or your own order management system? Build an integration layer using the Alter Product Public API and embed the tools you need on your website. This approach requires development work.
The Public API uses HTTP requests and JSON data. You can write an integration in the language and environment used by your backend. You do not need to rebuild your store in WordPress to embed Alter Product tools.
Below are examples of technologies you can use for a server-side connection. In each, you implement the same stages: API authorization, tool session creation and linking products, the cart and orders to your system.

Add integration to a Node.js backend, for example with Express or NestJS. Call the API from the server and provide the frontend with the data needed to embed the tool.

Connect an existing Python application, such as Django or FastAPI, to Alter Product products, sessions and orders through HTTP requests.

Use PHP in a custom store or application, such as Laravel or Symfony. Build your own API integration independently of the ready-made WordPress plugin.

Integrate tools with a Java backend, such as Spring, and link design data to your own product catalog and order handling.

Use a .NET backend, such as ASP.NET Core, for authorization, session creation and passing data into your existing store processes.

Build a connection in a service written in Go. Its standard HTTP client can handle API requests and JSON responses.

Add integration to a Ruby application, such as Ruby on Rails, and use your own product, cart and order fulfillment model.

Connect a Rust backend with an HTTP client and JSON handling. Incorporate sessions and shopping events into your service architecture.
In the browser, use React, Vue, Angular or plain HTML and JavaScript. TypeScript also works for implementing communication. The page embeds an iframe, handles postMessage events and connects to your backend.
The frontend handles page appearance and cart interactions, while the backend handles authenticated Public API calls. With frameworks that combine both layers, such as Next.js, keep permanent key handling and session creation exclusively on the server side.
Keep your own checkout, payment system, CMS and order fulfillment process. As part of implementation, connect these elements to design data and events from the selected Alter Product tool.





Alter Product provides 3D tools, design data and session mechanisms. Your backend connects them to products, customer accounts, the cart and order handling. Create intermediary endpoints for your frontend without exposing Alter Product credentials in the browser.
| Layer | Task |
|---|---|
| Your website frontend | Displays the iframe, responds to tool messages and updates the store interface. |
| Your backend | Authenticates Public API requests, creates sessions, controls customer access and saves links to your own cart or orders. |
| Alter Product Public API | Provides connection, product, tool association, order, file and asset access functionality. |
| Embedded tool | Displays the model and enables configuration or personalization according to the selected mode and prepared design. |
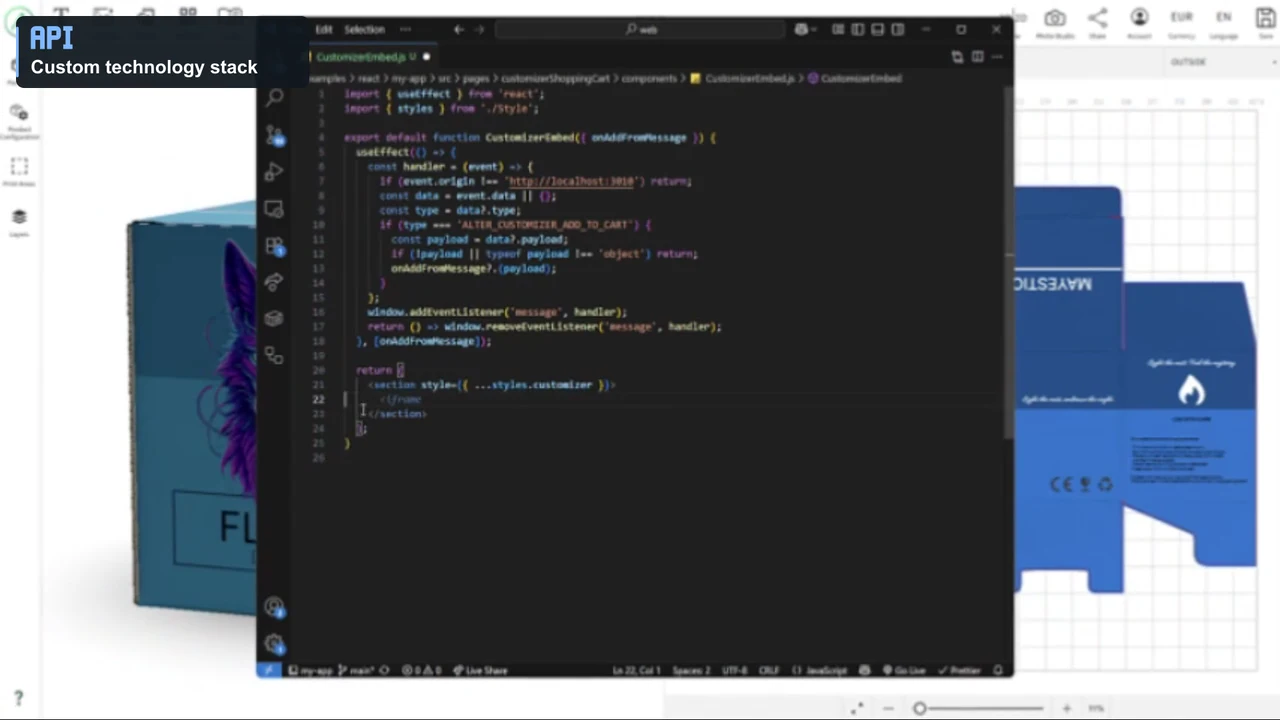
First establish a connection and an embedding session for one product. Then add configuration, design saving and order handling according to the selected tool.
Embedding instructions include parameters and examples. The postMessage chapters explain communication with the page, while the API documentation describes backend operations.
Test the product as a customer would use it: from opening the page to seeing the design attached to an order. Try it on desktop and mobile, including without being signed in to the admin panel.
After preparing one product, walk through the entire process. Then apply the verified setup to other catalog items.