Product Designer and Customizer
Advanced design tools
Combine artwork, text, and vectors in one design. Refine your print in Product Designer, check it on a 3D model, and let customers personalize it in Customizer.
From composition to product
Design in 2D and 3D
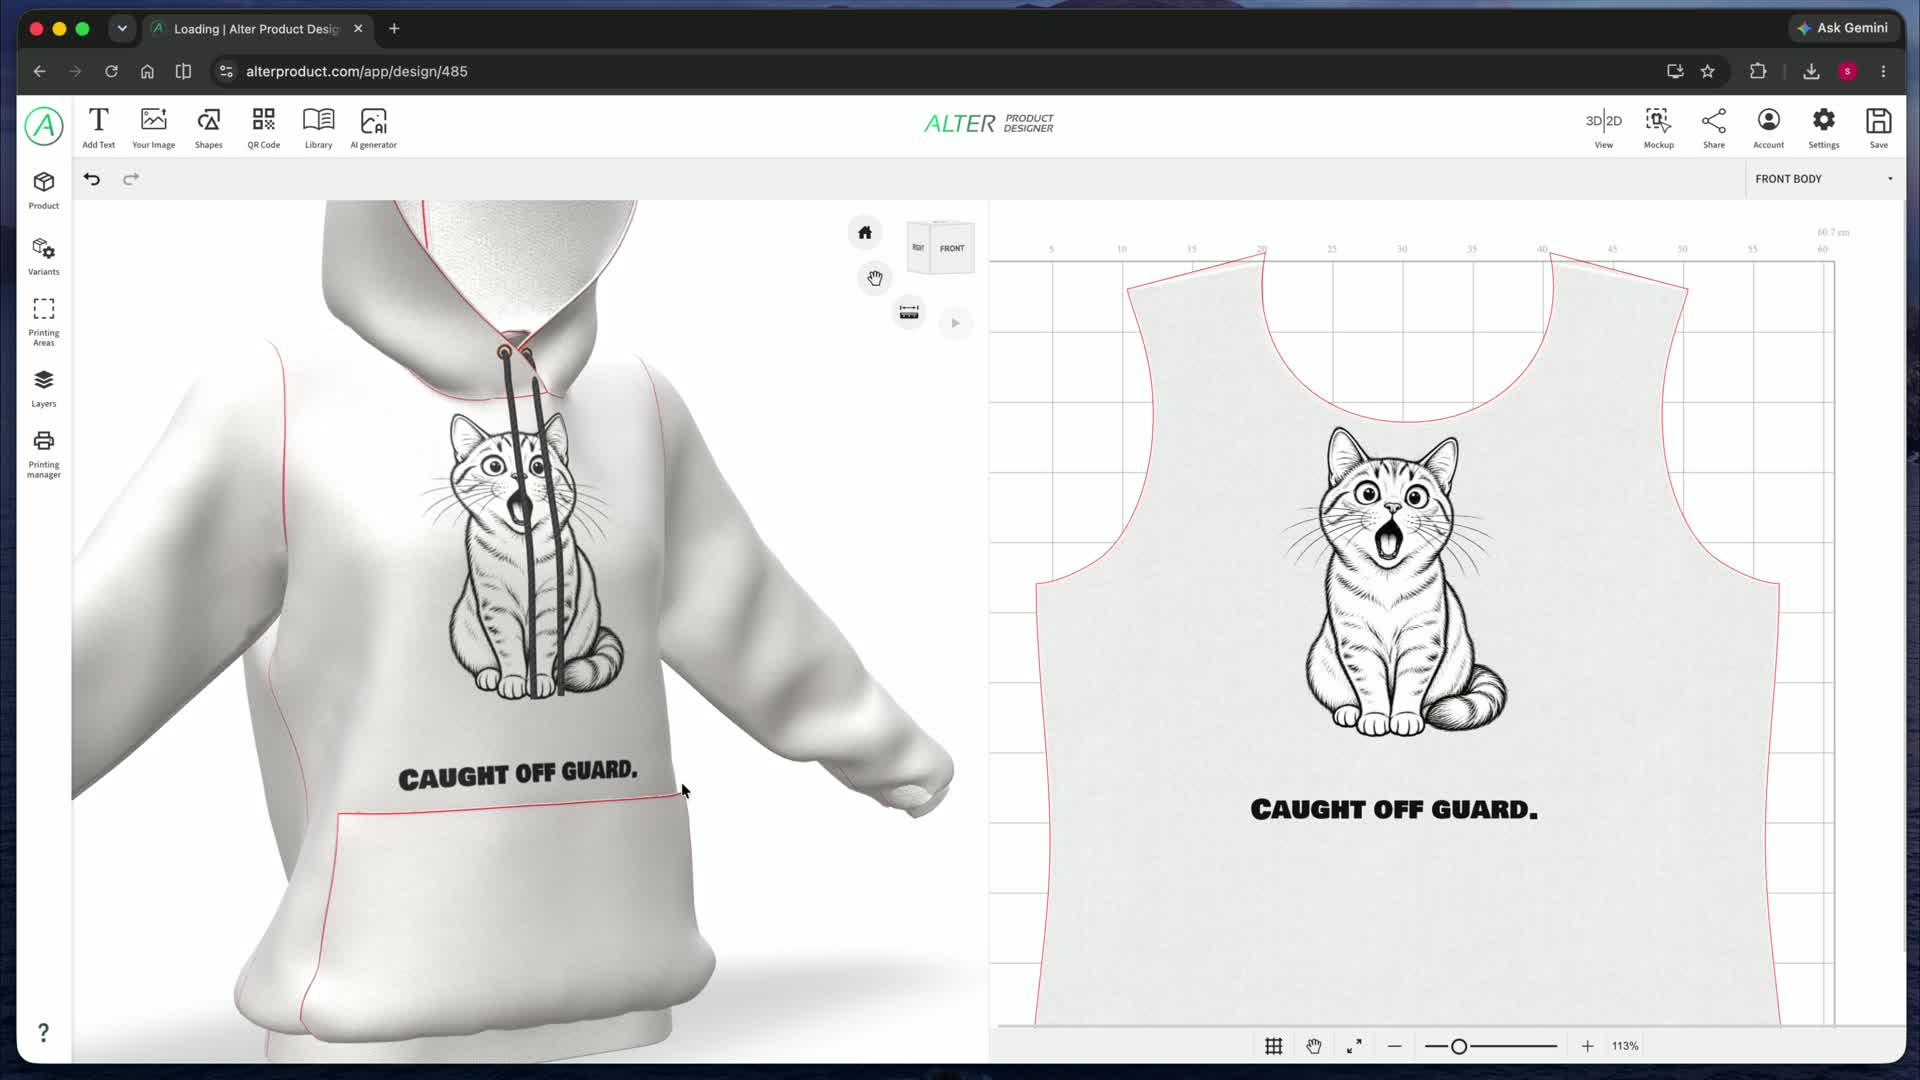
Design on a flat 2D area, work directly on the print areas of a 3D model, or use both views side by side. Place and adjust elements while checking their scale and position on the product.
The combined view helps you assess the composition in the context of the product's actual shape. See the same text, image, or motif both as a print design and as part of the finished visualization.
Grid and print preview in 2D
Grid and snapping
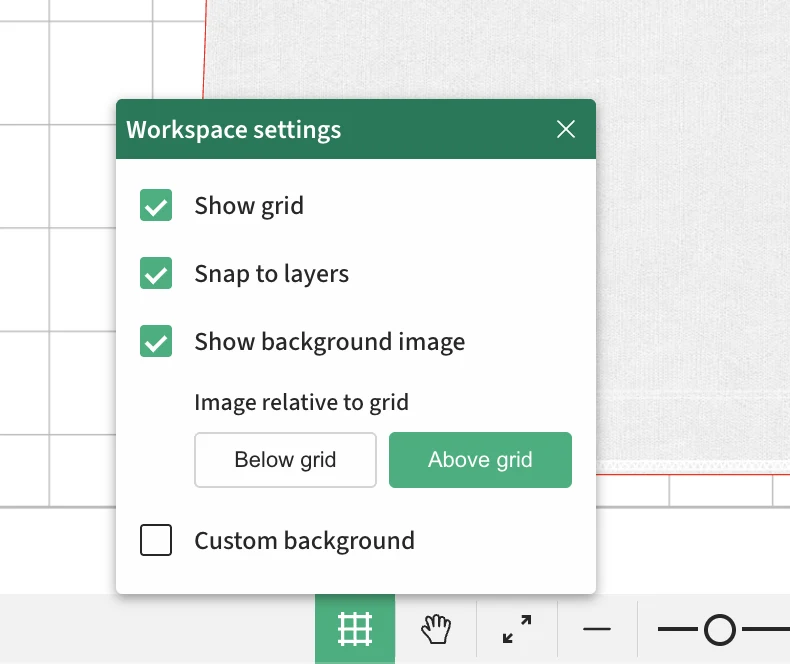
Enable the grid and snapping to layers to position elements more precisely.
Preview without the background image
Hide the workspace background image to assess the print itself more closely. Design elements remain visible.
Image above or below the grid
Choose whether the background image appears above or below the grid.
Custom preview background
Replace the image with a white, gray, black, or custom background. Check the edges and transparent areas of your artwork against a contrasting color. The change affects the preview, not the print design.
Images, opacity, and composition
A photo, illustration, or logo can be the starting point for your entire design. Adjust its appearance, transparency, and arrangement, then combine it with text and other layers.
Your own artwork
Add JPEG, PNG, and WebP images, as well as SVG files. Replace artwork in your composition to create another design variation.
Opacity from 0 to 100%
Combine motifs, build subtle backgrounds, and control how strongly an image stands out on the product.
Position and transformations
Move, scale, rotate, and flip elements. Adjust their position within the print area in the 2D view or on the 3D model.
Patterns for images, text, and shapes
Patterns from a single motif
Create a repeating pattern from a single element. Use it as a background, decorative motif, or composition within the print area. The repeat tool also works with text and shapes.
Grid
Grid
Regular rows and columns.
Brick
Brick
Alternately offset rows.
Half drop
Half drop
Every other column is offset.
Scatter
Scatter
A free arrangement with a random seed.
Circular layout
Round
Repetitions arranged around a circle.
Set the number of rows and columns, spacing, and pattern offset. Vary A/B versions with rotation, scaling, or reflection. Alternate elements, rows, or columns, or use a checkerboard arrangement; use a random seed for scatter.
Filters and image adjustments
Match artwork to the character of your collection without leaving the design. The filter panel includes light and color correction, detail processing, halftone, and semitransparency controls.
| Filter or adjustment | What you can do |
|---|---|
| Brightness | Lighten or darken artwork before placing it in the composition. |
| Contrast | Increase or soften the differences between light and dark areas of an image. |
| Black and white | Turn a color image into a monochrome version of your design. |
| Invert | Invert the colors to create a negative effect. |
| Hue | Shift the color tones to give your artwork a different character. |
| Saturation | Control color intensity - from muted to vivid. |
| Vibrance | Fine-tune color vibrance as a separate color correction step. |
| Red gamma | Adjust the tonal response of the red channel. |
| Green gamma | Adjust the tonal response of the green channel. |
| Blue gamma | Adjust the tonal response of the blue channel. |
| Sharpen | Emphasize edges and fine details in your artwork. |
| Blur | Soften the image for smoother transitions. |
| Halftone | Build a halftone effect with dots, crosses, or lines and adjust its structure. |
| Remove semitransparent background | Refine transparency using an alpha threshold and transition softness. This adjustment works on pixel opacity rather than object recognition. |
Six halftone styles
Halftone with control over detail
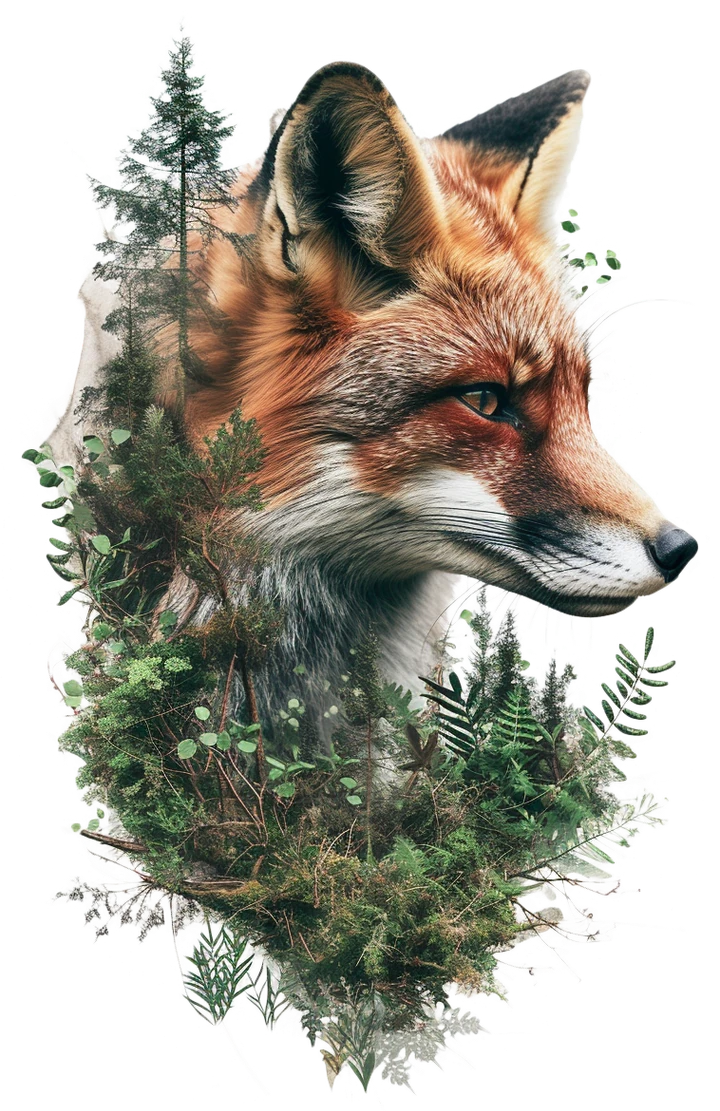
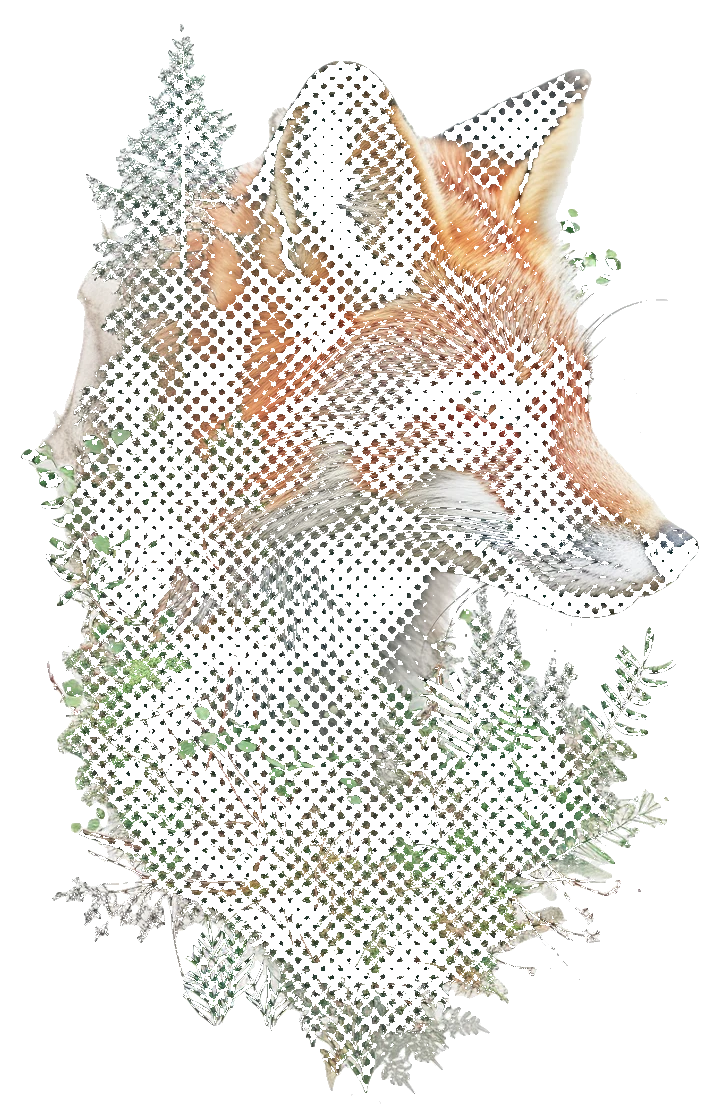
Give your artwork a rhythm of dots, crosses, or lines. Halftone lets you shape the print's structure deliberately, from a fine screen to a bold decorative effect.
Source artwork
Halftone: dots
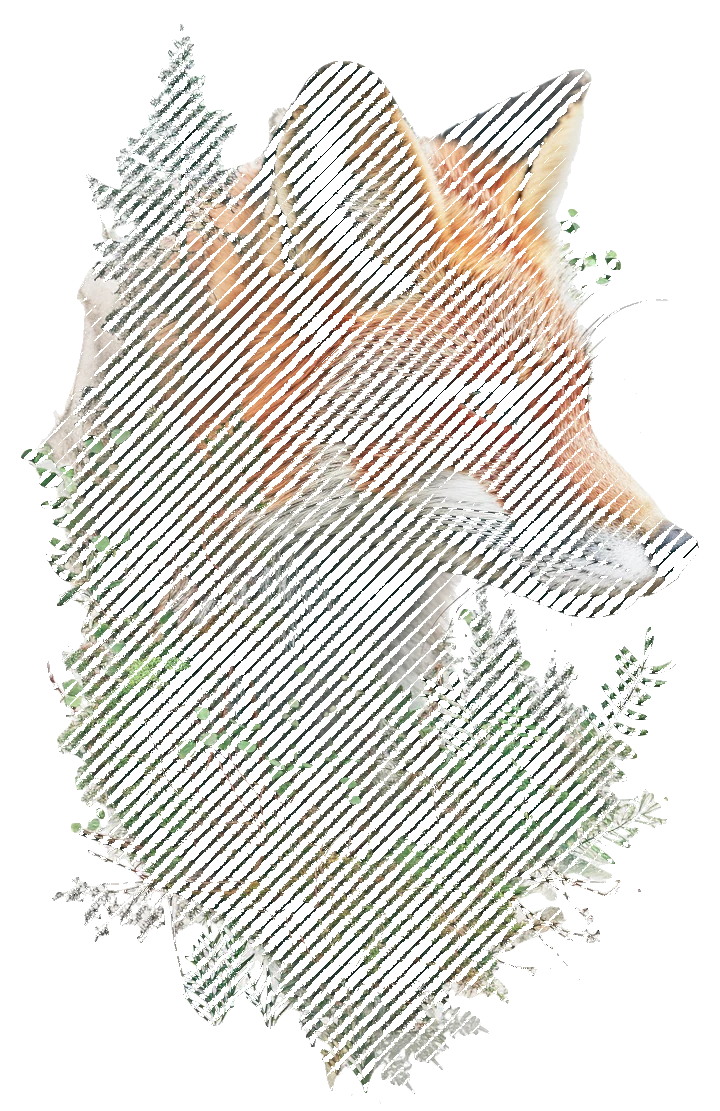
Halftone: lines
Match the halftone shape to your artwork
Round
Square
Diamond
Ellipse
Crosses
Lines
Spacing and size
Set the density of the halftone and the size of its elements.
Angle and contrast
Rotate the grid and adjust how the artwork's brightness affects the halftone.
Edge softness
Choose sharper or softer edges for the elements.
Invert and full opacity
Invert the brightness response and enable elements without semitransparency.
Remove backgrounds and selected colors
Isolate a motif and prepare it to combine with other elements. Start automatically or work manually, and remove a selected color with the eyedropper and tolerance setting.
Automatic background removal
Isolate the main subject of an image to use it in a print without its surrounding background.
Manual mask refinement
Remove and restore areas with a brush. Adjust its size and strength to refine small elements and edges.
Color knockout
Pick a color with the eyedropper in the manual background removal tool. Set the tolerance to remove matching pixels throughout the image, then refine the mask with the brush.
Manual masking step by step
Work on the image mask and control which areas remain visible. Apply the result once the edges and transparency are ready.
Brush and eraser
Hide image areas with the eraser and restore them with the brush. Adjust size and strength, and edge hardness in supported browsers.
Removing a selected color
Pick a color with the eyedropper and adjust the range tolerance. Remove matching areas and refine the details with the brush. In supported browsers, you can also soften the boundary with blur.
Circular mask
Enable a circular mask and change its radius, edge softness, and center position along the X and Y axes.
Review and undo changes
Change the preview background color, zoom in, and pan to assess the edges. Undo and redo operations, or clear the mask to restore the image.
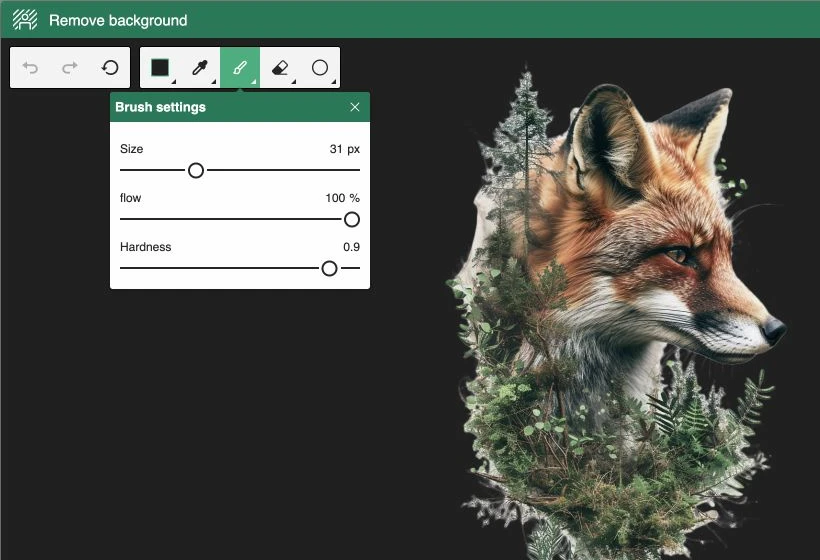
Example use: remove a solid background from a logo, keep just the motif, then place it on a colored product or repeat it as a pattern. Color knockout also affects the selected color inside the artwork, so refining the result with a mask is worthwhile.
From a caption to expressive typography
Text that gives your design character
Create lettering that suits the product, brand, and artwork style. Choose a typeface, reshape the text, and combine a fill with a stroke or shadow.
Over 1800 Google Fonts
Search typefaces by name and filter them by category and supported writing systems. Choose from serif, sans serif, display, handwriting, and monospace fonts.
Typography under control
Adjust size, letter spacing, line spacing, and alignment. Change letter case, apply underline or strikethrough, and use the bold and italic variants available for the typeface.
Fills, strokes, and shadows
Combine solid colors with linear or radial gradients. Add a solid or dashed stroke and a shadow with your own color, offset, and blur.
Four ways to shape text
Standard text
Create simple lettering and multiline compositions with control over alignment and line spacing.
Curved text
Curve the lettering and adjust the arc angle and distance. Build a composition around an emblem or central image.
Bridge text
Change letter height at the edges and in the middle of the text. Control the smoothness of the transition and the vertical position of the center.
Oblique text
Give your lettering direction by adjusting the height at the start and end, as well as the end's vertical position.
Shapes, paths, and vectorization
Combine simple figures into compositions or move on to precise work with points and curves. The path editor refines supported shapes and path layers.
Ready-made shapes
Start with a rectangle, line, ellipse, circle, triangle, hexagon, octagon, or star. Refine the fill, stroke, and shadow; for rectangles, adjust the corner radius too.
Your own outlines
Turn a preset shape into an original emblem, decoration, or outline. Edit points on supported shape and path layers in the 2D view while checking the result on the product.
Point and curve editor: from sketch to precise outline
Select an unlocked shape or path layer and enter vector editing. Work on one layer at a time, drawing new sections or refining the existing geometry.
Pen and path extension
Draw new segments with the pen, join them to existing points, and close outlines. Add new points on a path or remove unnecessary ones to refine the shape.
Point selection and lasso
Choose a single point or select a larger section with a selection box or lasso. Work on the selected part of the outline while keeping other points in place.
Moving along a path
Move points freely or along the existing path. Move selected points together to change an entire section of the composition.
Bézier curves and handles
Shape curves with incoming and outgoing handles. Enable them separately and choose independent handles, handles mirrored by angle, or handles that preserve both angle and length.
Connecting points
Connect selected points with a segment. Extend the path and refine the connections that form your outline.
Cutting paths
Draw a cutting line across a path to split it. Then refine the resulting sections with the point and curve tools.
Expanding and narrowing outlines
Offset selected points by a set distance. Apply the adjustment in both directions, or only horizontally or vertically, to change the proportions of the selected section.
Symmetry axis and reflection
Set the position and angle of the axis, then reflect the entire outline or selected points. Adjust the point joining distance near the axis to refine the connection between the two sides.
Undoing and redoing changes. Try different outline variations and return to earlier operations while editing.
Refine the appearance of fills and strokes
Set a fill color or gradient, stroke width, and shadow. Choose a solid or dashed line with custom dash and gap lengths. Switch stroke joins between miter, bevel, and round, and line caps between butt, round, and square. Round rectangle corners together or individually.
Example use: draw half an emblem, reflect it across the axis, and refine the curves. Then add a stroke and curved lettering to create your own print motif.
A Product Designer tool
Vectorize images to SVG
Turn a PNG, WebP, or JPEG image into vector artwork. Set the number of colors and level of detail, compare the result with the original, then apply it to the design or download the SVG file.
- A palette of 1 to 32 colors and an adjustable level of detail.
- Linked to the source image: you can disable vectorization and recalculate the result.
- Takes the source mask and filters into account; halftone can remain repeating vector geometry.
- Processed locally, without using an AI image generation service.
A smaller palette simplifies the artwork's style, while a larger one preserves more color differences. Choose settings that suit your design and review the preview before applying them.
QR codes that fit your design
A QR code can be a consistent part of your product design. Combine a link to instructions, a collection, or your brand website with your own colors, shape, and code element styles.

Classic geometry
Square elements and a solid color.

Soft corners
Rounded elements, separate frames and centers.
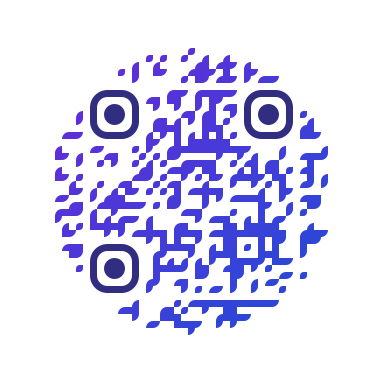
Gradient and brand color
A circular layout, color transition, and independent corner color.
Six dot styles
Give the code a geometric, soft, or decorative character. Combine the style of its inner elements with an independent appearance for the corners.
- Square
- Rounded
- Extra rounded
- Classy
- Classy Rounded
- Dots
Code content and shape
Encode a website, instructions, or collection URL, or your own text. Choose a square or circular shape for the entire code and fit it into the composition.
Separate corner styles
Set the appearance of corner frames and their centers independently. Frames can be square, extra rounded, or circular, and centers can be square or circular. You can also keep the default style.
Four independent color areas
Choose separate colors for dots, corner frames, corner centers, and background. Keep a consistent brand palette or highlight selected parts of the code.
Gradients and precise color values
Use a solid color or a linear or radial gradient. Add color stops, set their positions and opacity, and enter HEX or RGB values. For linear gradients, adjust the transition direction too.
Custom or transparent background
Add a colored or gradient background, or turn it off so the code works with the artwork and product color. Choose a contrast that keeps the code readable.
Space for a logo or motif
Reserve a square, horizontal rectangle, or vertical rectangle in the center. Pair this space with a logo or motif added as a separate design layer.
Scale, rotate, and position the code alongside the other design elements. Before production, check that it scans at the intended print size, especially after changing colors or adding a motif in the center.
Layers, groups, and masks
Keep even complex designs organized. Separate text, images, and decorations, and control their combined visibility with groups and masks.
Order and visibility
Move elements in the layer stack, hide them, and restore them. Build your composition in stages without deleting earlier ideas.
Groups
Combine related elements into a group to manage complex designs more easily.
Masking
Use the bottom layer in your selection as a mask for the others. Limit the artwork's visibility to a chosen shape.
Protecting design elements
Pin fixed elements to the top or bottom of the stack with an owner lock. Keep your logo or other brand elements outside the customer's editing scope while leaving room for personalization.
Your design. Your customer's personal touch.
Personalization for your customers
Offer customers Customizer on your website. In editing mode, they can add text, images, shapes, and QR codes, and refine their composition with a product preview.
As the owner, prepare the design and pin elements that should stay fixed with an owner lock. Editing availability depends on the embedded tool's configuration and permissions. The image vectorization described above is a Product Designer tool.
From your own artwork to a personalized product
Combine image editing, typography, and a 3D preview in one workflow. Prepare the composition, keep control over its fixed elements, and give customers room for their own ideas.
See the tools in action