3D composition
Build a visual from a prepared model.
- Set the camera, framing scale, lighting, shadows and background.
- Generate the base image and the layers needed to display subsequent prints.
Mockup generators - presenting and selling products
Prepare how your product is presented once, then use it to show new prints and color variants. A mockup generator stores the view, background and how graphics are applied to the product. A finished mockup combines these settings with your customer's current design or your own design in Designer.
You can use the generators available for the selected model or create your own in Product Generator's Mockup mode. Below you will find use cases, 3D scene and photo settings, mapping tests, visual downloads and their use in the WordPress + WooCommerce plugin.
Screenshots show actual Alter Product tools, some with an English interface. You can open every screenshot at full size.
A generator stores how the product is presented. A finished mockup is an image of a specific design created using that generator.
If the selected model already has mockup generators, you can use them immediately in Product Designer. Select a view in the Mockup window to preview the graphics and colors of the current design.
To create your own generators, open the model project in Product Generator and switch to Mockup mode. You need a prepared model and surfaces on which to display the graphics. Custom patterns, simulation and model materials are covered in the separate 3D model creation guide.
For example, prepare the front of a T-shirt against a light background. For the next print, you do not need to set up the camera, lighting or collar outline again. Open Mockup in Designer, and the saved generator shows the current design in the same frame.
| Component | What it controls |
|---|---|
| 3D model | The product's shape and the surfaces on which you place your design. A single model can have several generators, such as front, side and back views. |
| Mockup generator | Framing, background, lighting, part mapping and layers. Edit it when you want to change how the product is presented. |
| Design in Designer or Customizer | Graphics, text and selected product colors. Changing the design creates a new mockup using the prepared generator. |
| Downloaded PNG mockup | A finished image of a specific design and view. Use it in a listing, catalog or promotional material. |
Choose the stage that matches what you want to refine. 3D composition and photo fitting offer two ways to prepare the base image.
Build a visual from a prepared model.
Use your own product photo as the basis for the presentation.
Refine the outlines of the parts and how the print appears on the image.
Create the composition once, then reuse the generator as the graphics and colors change.
Choose how to prepare the generator based on where you will show the product. You can use the same tools for the following scenarios by changing the composition and print design.
Start with your goal: comparable variant images, a recognizable brand style or a visual based on your own photo.
A T-shirt against a light background, at a consistent scale and with a subtle shadow. Each new print appears in the same view.
Use a background in your collection's color, a gradient or your own image. Adjust light and shadow so the product fits the setting.
Have a photo of a T-shirt in your chosen setting? Use Photo fitting to match the model to the photo and prepare it for subsequent prints.
The customer changes graphics, text or color in Customizer. The generators available for the model create visuals of that specific design.
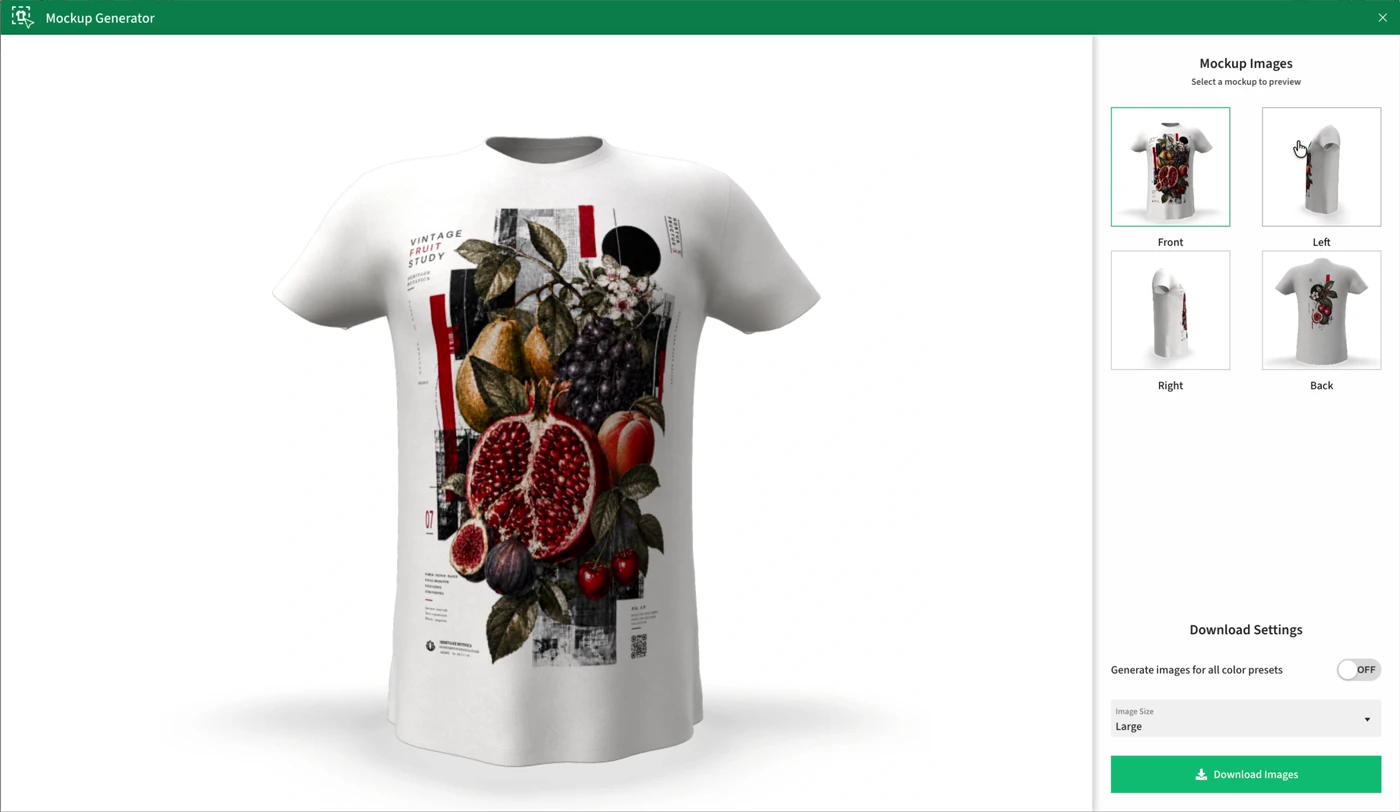
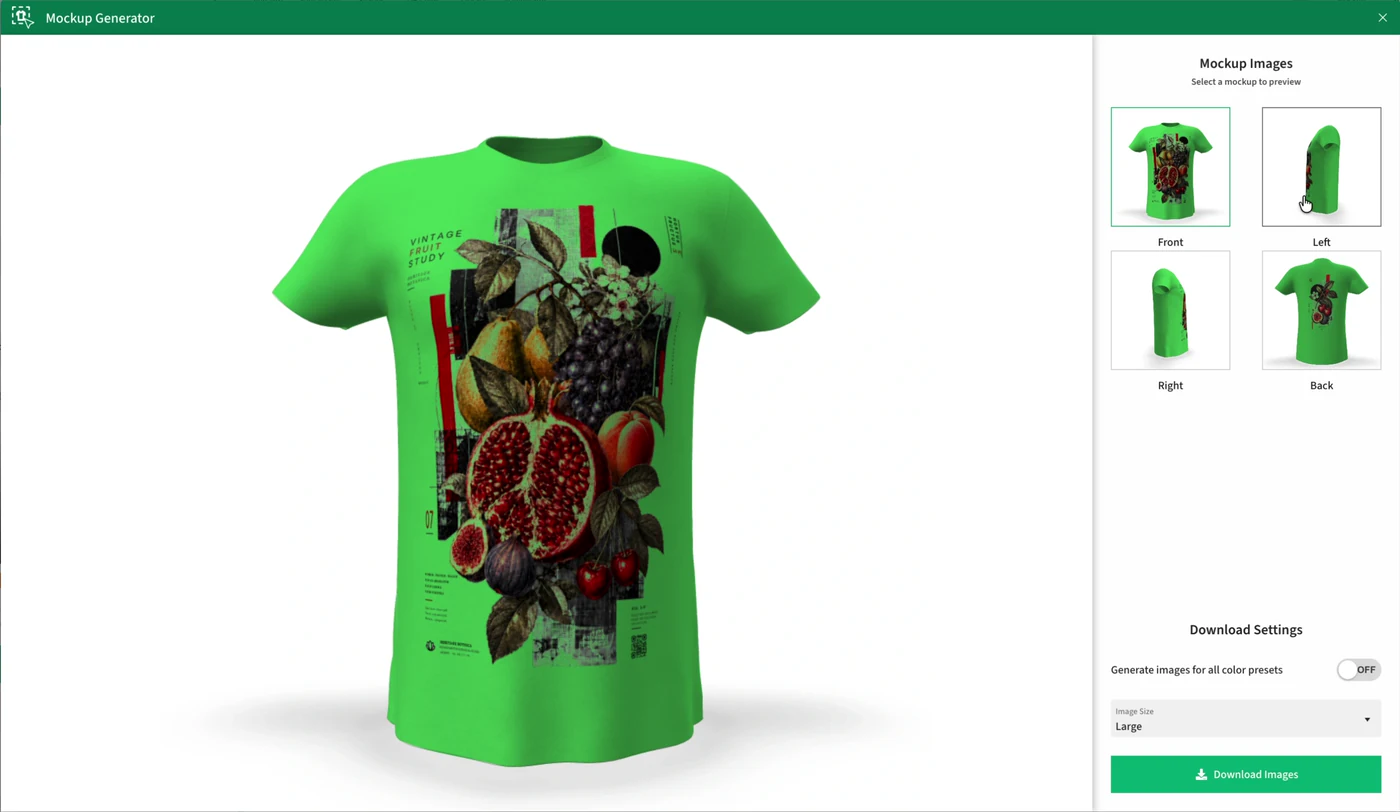
The application captures below show the same fruit-themed design in two product colors. The framing stays consistent, and the mockup shows how the print combines with the selected T-shirt color.
With your model ready in Inspector, switch to Mockup mode. Here you prepare a shared composition for subsequent graphics and product variants.
In the Project mockups panel, choose Create automatically to prepare four views: Front, Left, Right and Back. You can also use Add new to add a custom view, rename it and change its order. Each generator retains its own framing and settings.
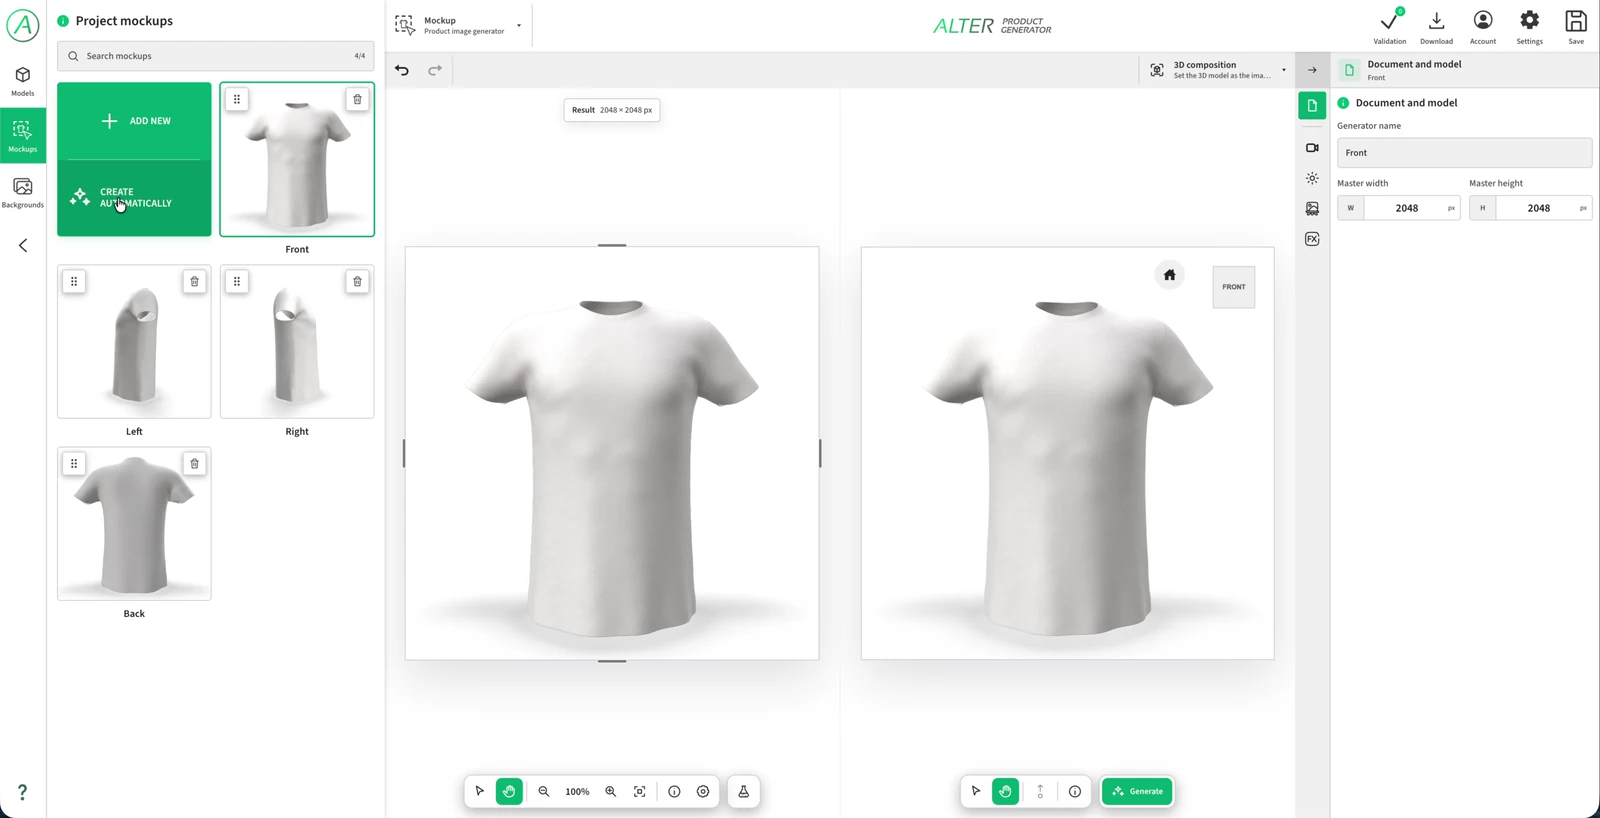
In 3D composition, you position the product as the basis of the image. Match the framing and lighting to the style of your catalog or brand.
For a catalog, start with a simple background and a clearly defined product silhouette. Use an orthographic camera for a restrained presentation without perspective foreshortening. Perspective makes the spatial shape more prominent. Leave room in the frame for sleeves, the bottom of the product and its shadow.
A floor shadow helps ground the product in the composition, while a wall shadow adds depth. You can adjust their position, size, opacity and softness independently. Use exposure and curves for highlights, midtones and shadows to keep details visible. Keep the print sharp for catalog images; tailor Bloom and depth of field to more atmospheric shots.
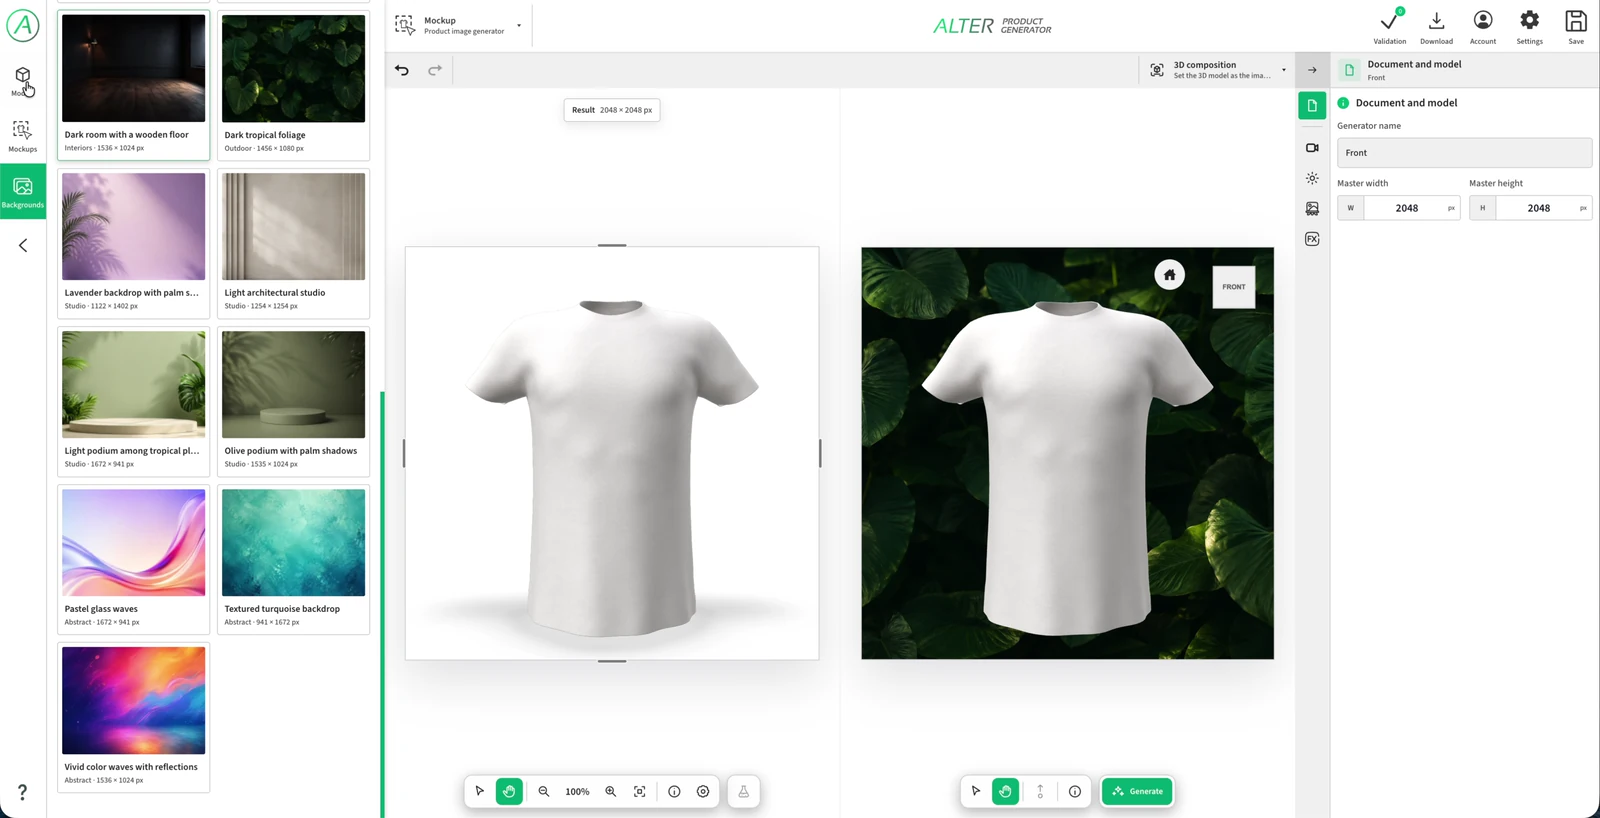
Photo fitting mode lets you use your own JPG, PNG or WebP. Adjust the camera and scale of the overlaid model, and control its opacity and position. For clothing, bone tools, sleeve position presets and soft deformation with adjustable radius and strength are available. Use the prepared fit to generate the mockup layers.
For supported clothing, you can create an automatic rig and adjust bones by moving, rotating and changing their length. Mirroring helps preserve symmetry, while sleeve presets let you start from the original position, slightly lowered or alongside the body. Soft deformation and soft rotation work locally: choose the radius, strength and falloff - smooth, linear, spherical or sharp. A wireframe preview helps you assess the shape.
The base image, print mask, shadows and highlights work together so the graphics follow the product's appearance and shape. Preparing them correctly lets you reuse the same visual.
In 3D composition, choose Generate all layers; when fitting to a photo, choose Generate from fit. Then inspect the individual layers and the result on the product.
| Layer | What you control |
|---|---|
| Base image | Product framing, background and scene appearance. Regenerate it after changing the composition. |
| Print mask | The visible graphics area, threshold, edge softness and offset, and edge smoothing. |
| Shadows | Strength, gamma and white point, so the print preserves the product's shading. |
| Highlights | Threshold, strength and gamma of bright areas in the composition. |
Before working with the final design, open the test print tool. You can assign a pattern separately to the available parts and, where color changes are supported, also test the color of the whole product or individual parts.
The colored grid helps reveal stretching, changes in direction and discontinuities in the graphics. Pay particular attention to the collar, sleeves and side edges.
The markers and central graphic help you judge where the print lands and whether an outline or mask clips it.
A pattern with the Alter Product text helps assess letter legibility, proportions and direction on a given part.
Compare light and dark variants. This makes overly strong shadows, blown highlights or a light fringe around the print easier to spot.
Go to Mapping, select a product part and adjust its outline points and Bézier handles. You can precisely correct the collar, sleeve and edges, then recalculate the layers. The generation menu also lets you recreate outlines or refresh only the base image while keeping the existing vectors.
First correct the outline geometry if the print extends onto the background or falls short of the edges. Then refine the mask and its softness. Adjust shadows and highlights last, comparing the result on light and dark product colors.
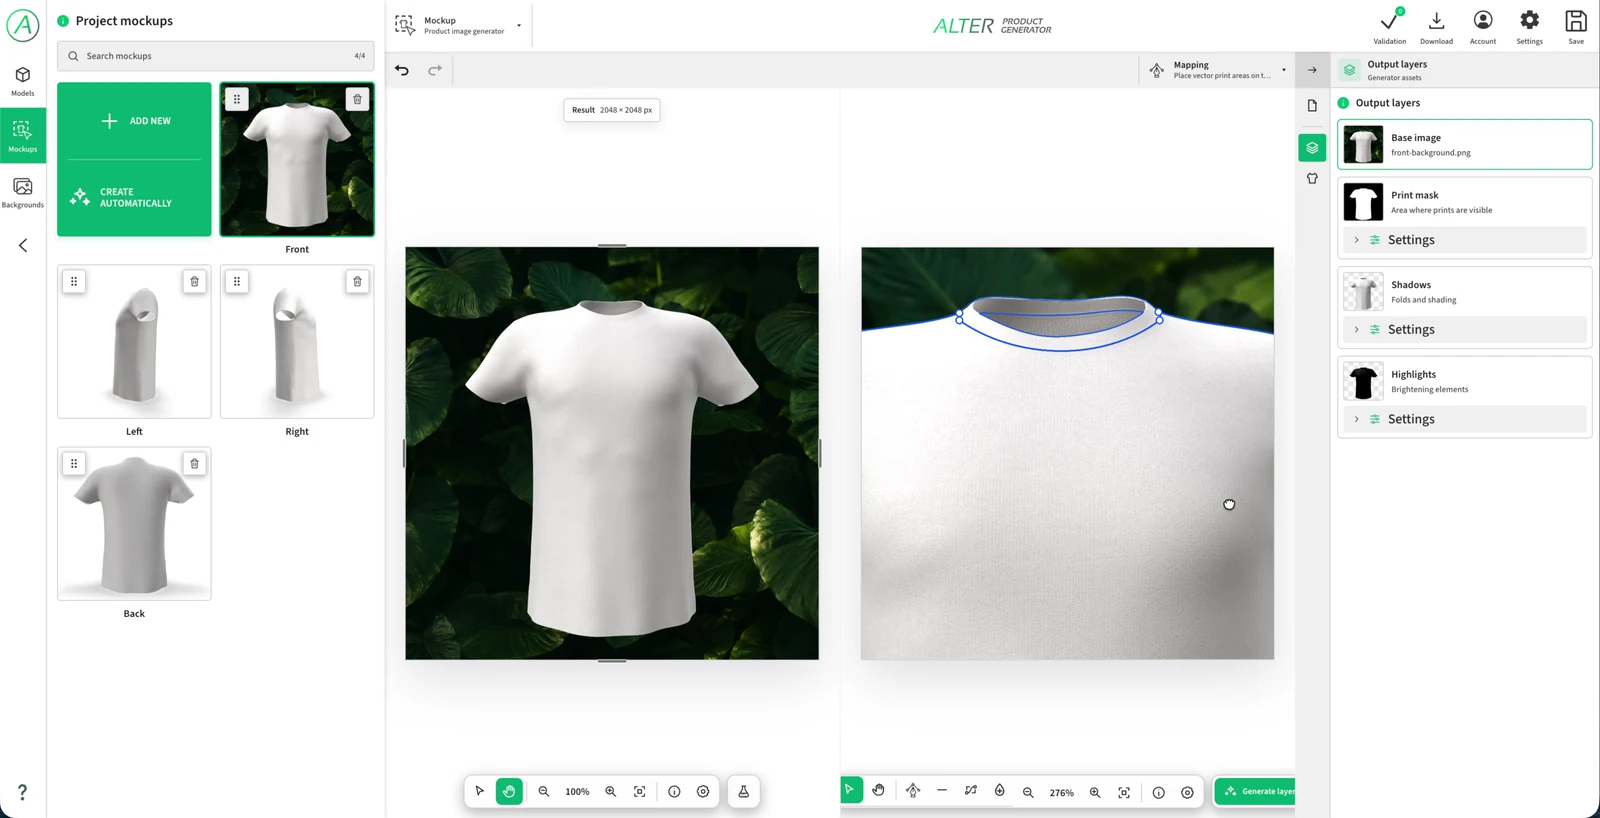
Choose what to update so that manual corrections are preserved where they are still needed.
| Scope | When to use it |
|---|---|
| All layers | After preparing the scene or making a major composition change, when the base image and mockup layers need updating. |
| Layers from saved vectors | After manually correcting an outline, when you want to recalculate the result while keeping the refined paths. |
| Recreate outlines | When you want to derive outlines from the model again. This rebuilds the geometry, so it may replace previous manual corrections. |
| Base image only | When you need to refresh the image without overwriting existing vectors. After changes that affect shadows or the mask, check the relevant layers too. |
After refining the views, save the Product Generator project. The generator collection belongs to the model and its revision used by Designer. In the application, the project is saved on the server; in the WordPress plugin, it is stored locally.
After changing the camera, background, lighting or fit, refresh the relevant layers and check the result before saving. Downloading a PNG from Designer creates an image of the current design; saving the model project preserves the generator for further editing.
The prepared generator becomes part of working with the model. While designing, you use ready-made views and the current personalization.
Open Mockup in Product Designer. In the Mockup Generator window, select the front, side or back thumbnail. The preview uses the graphics and colors of the current design. Prepare the camera, lighting and background beforehand in the model generator's Mockup mode.
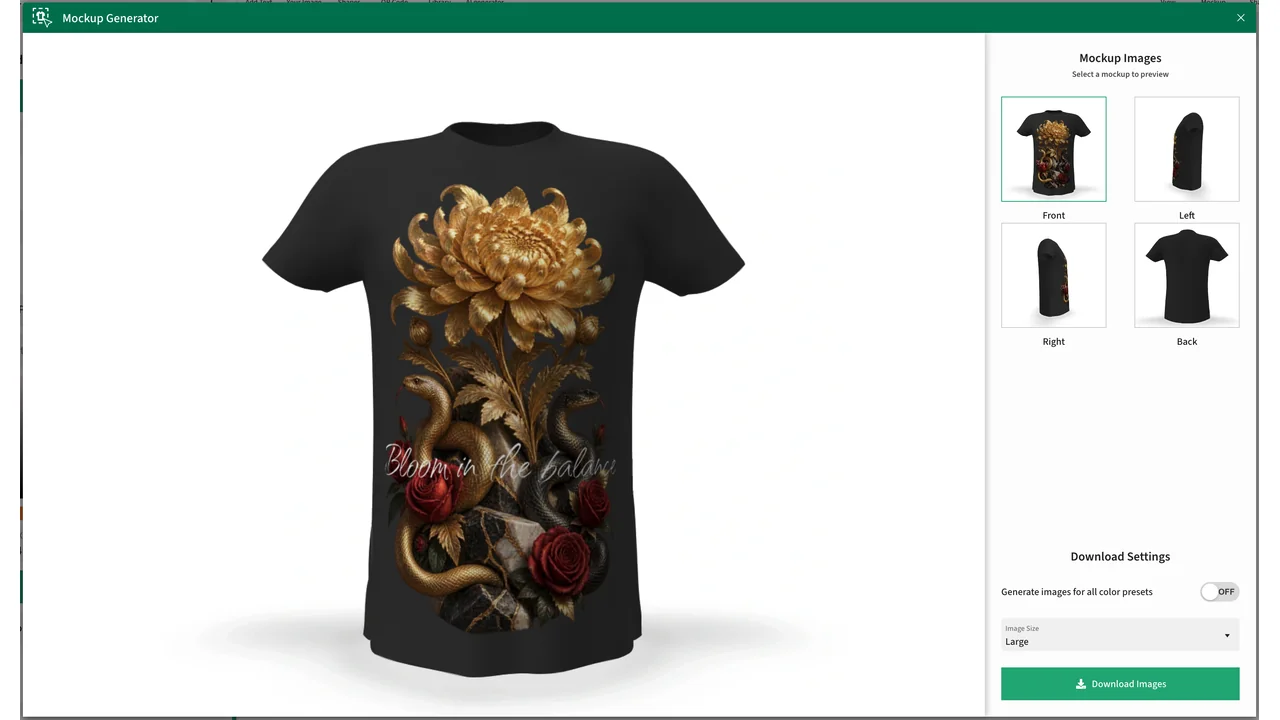
Select a view and an Image size: Thumb 256, Small 512, Medium 1024 or Large 2048 px. The value specifies the longer edge; the proportions come from the generator. Download images saves a PNG of the currently selected view.
In the WordPress + WooCommerce plugin, you use a local project and its linked model revision. For a product with available mockup generators, the application creates personalization images when the design is added to the cart. Once the files are saved, the plugin displays them beside the cart and order item.
A mockup presents the product's appearance: the finished artwork, its shape, shadows and background. Use it in a listing, catalog or to show customers their personalization.
For production, prepare print area files in Printing Manager. This also applies to AOP designs where artwork covers different parts of the product. The Print-ready files guide explains production file settings and downloads.
Test several different prints and product colors. A generator prepared with one simple motif should also correctly show small text, graphics near an edge and a larger AOP print.
Follow the same path that you or your customer will use later.
Start with the stage responsible for the problem. Not every correction requires setting up the whole scene again.
| What you see | What to check |
|---|---|
| The print extends beyond the product or disappears at the collar | The part outline in Mapping, Bézier handles and print mask settings. Recalculate the required layers after the correction. |
| The grid or letters are excessively stretched | The model's fit to the photo and the mapping of the part. Correct the shape before trying to hide the problem with an overly soft edge. |
| The graphics are too dark or too bright | Shadow and highlight layer settings. For 3D composition, also check scene exposure and lighting. |
| The old image remains after changing the background | Update the base image with the appropriate generation command and save the project. Selecting a background changes the scene but does not replace the previously generated image. |
| The ZIP package contains no side or back views | The variant package covers the selected view. Select the next thumbnail and download images for that side of the product. |
| The all-color package option is missing, or only one PNG downloads | Check the number of matching presets for the material, print technique and size. At least two are required. |
| The cart shows the standard product photo | Check that saved generators and their assets are available for the model revision used by the design, and that the mockups were saved successfully. |