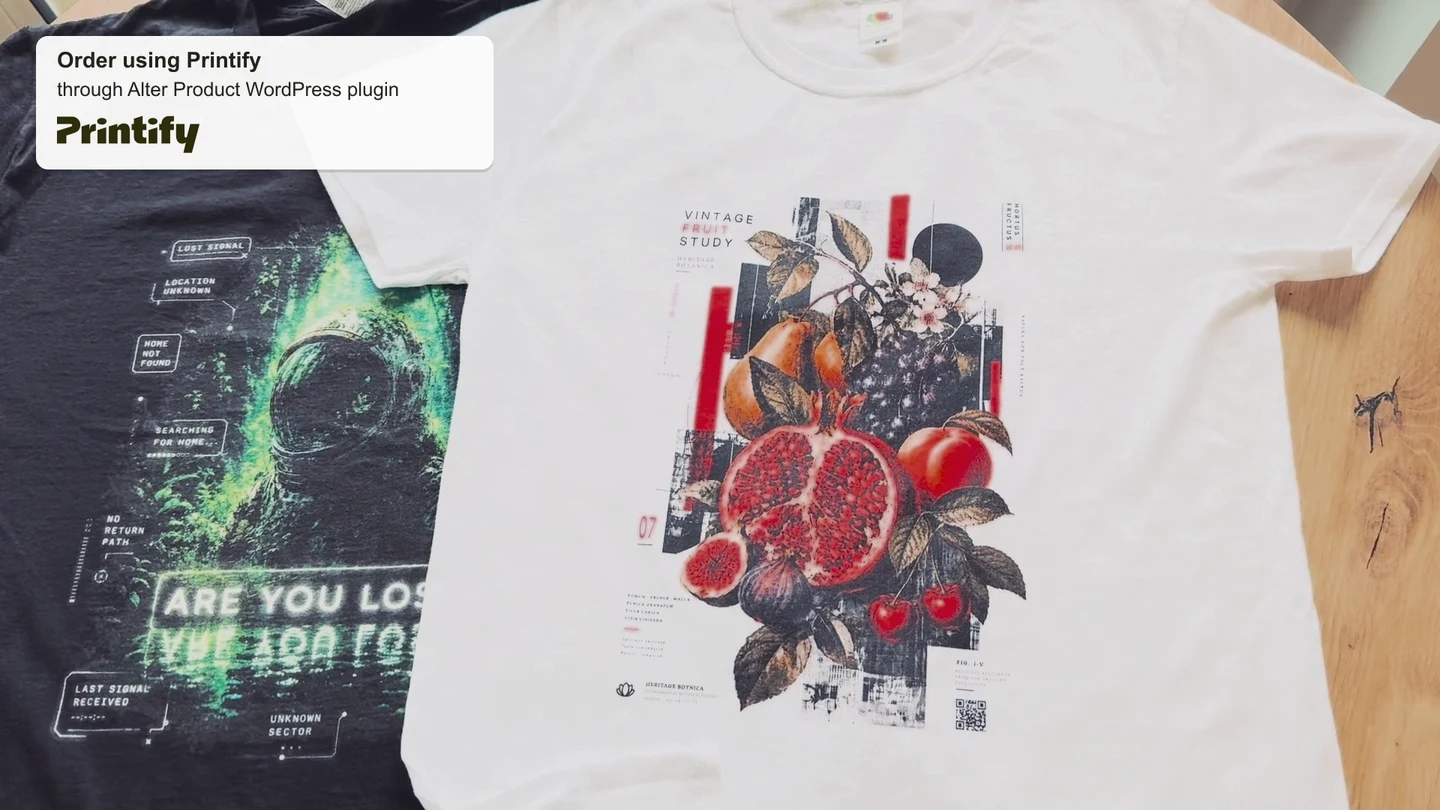
From a design on the product to a production file
Print-ready files and POD fulfillment
Prepare PNG, SVG or PDF files for your own production, or generate materials for Printify and Printful through the WordPress + WooCommerce plugin. Define print areas, check sizes and choose export settings.
In the POD workflow, you connect the product and variants to the provider's catalog, save production files and submit the order for fulfillment from the WooCommerce panel.
The screenshots show the actual interface in English. Click an image to view the details at full size.
Prepare the print areas first
A print area defines the part of the product intended for the composition. Its boundary affects what you see on the model and what is exported. Before downloading files, check both the position of the print and its physical dimensions.
Choose the product surfaces that will carry the print
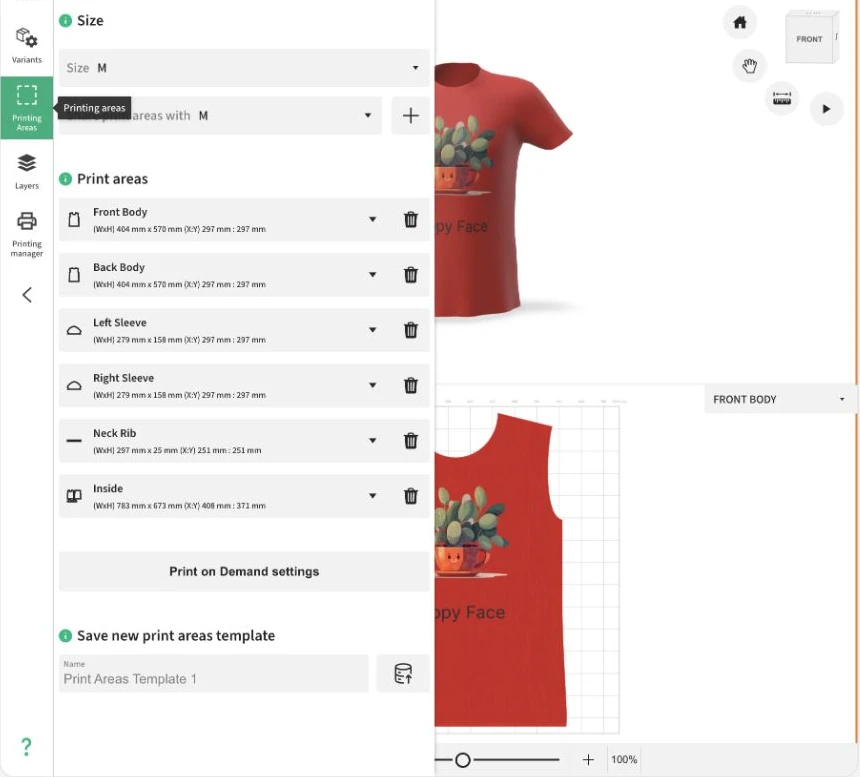
In Designer, open Printing Areas in the left panel. You will see the model's available surfaces, such as front and back, depending on the selected product. You can enable the areas you need and remove them from the current configuration. The add button uses the surfaces provided by the model.
Click an area's name to select its boundary in the workspace. Then choose a shape type and adjust it to the planned production process. When you finish editing the areas, return to working on graphics and text.
- Open Designer → Printing Areas and select the product size.
- Enable the required surface from the Add list or select an already active area.
- Click an area in the list to edit its boundary in the 2D view.
Set the shape, dimensions and position
You can choose a rectangle or circle for the area. If the model has its own outline, Default shape is also available. After editing the path, you can use Custom shape. This is the boundary to which the composition is clipped during export.
After selecting an area, use the tools above the 2D view. The transformation controls let you set width, height, X and Y positions, and rotation. Enable proportional scaling if changing one dimension should preserve the aspect ratio. You can switch measurement units between millimeters, centimeters and inches.
Vector editing lets you refine the outline using points and curves. You can add or remove points, join them, cut the path, change curvature, and use offset and mirror tools. Check the result in the 2D view and on the 3D product before preparing the files.
For models prepared for AOP (all-over print), you can develop a print on surfaces corresponding to product parts, such as front, back and sleeves. Keep the correct shape and scale of each area and prepare files for the required sizes. In POD fulfillment, AOP availability and the area layout depend on the selected product and provider.
Decide which sizes share areas
The Size selection identifies the product configuration whose areas you are editing. The Share print areas with field shows the sizes using the same set. This is useful when several sizes should share one print configuration.
If one size needs separate boundaries, use the plus button next to sharing. This creates a copy of the current set assigned to the selected size. You can refine it without changing the other sizes that use the previous collection.
After changing size, check the physical dimensions and graphic placement again. Manual export uses the currently selected size and its areas, so switch the configuration before preparing files for other sizes.
Save the configuration for future designs
In Save new print area template, name the configuration and use the save button. You can later load this template in another design for the same product. It preserves the area configuration, rather than a finished arrangement of graphics and text.
To use an existing configuration, go to Load print area template, select a name and click the load button. Loading replaces the current settings, so check the boundaries and dimensions afterward. In the local WordPress editor, you work with templates stored by the plugin.
Download files for your own printing
Printing manager prepares a composition file based on the print area. Choose parameters that suit your production process or the print shop's requirements, then download the result to your computer.
Choose areas and layers to export
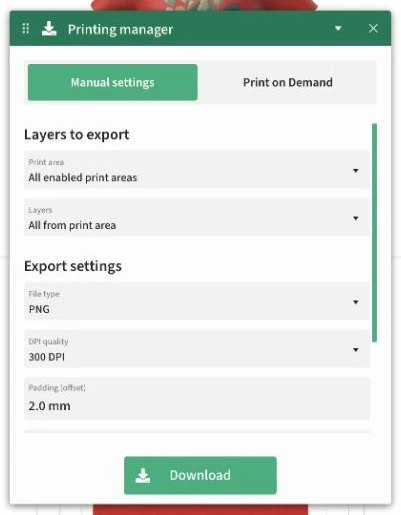
Open Printing manager in Designer's left panel. In the WordPress editor, select the Manual settings tab. If the POD tab is unavailable, the manual export panel opens directly.
In Layers to export, select a specific Print area or all enabled areas. The Layers field lets you export the entire composition or only the selected layers of that area. For the second option, first select the design elements you need.
Choose the format and DPI
In Export settings, choose the File type: PNG, SVG or PDF. DPI quality has four values: 72, 150, 200 and 300. The file dimensions come from the area's physical size and the DPI setting, not the size of the product preview on screen.
Choose the format for your next steps. PNG saves a raster image and can preserve a transparent background. SVG allows further work with vector elements, but may also contain embedded images. PDF delivers the composition in a document whose size follows the export settings.
- PNG: choose it when you need a finished print image, including transparency.
- SVG: choose it when the next stage uses a vector format and embedded graphics.
- PDF: choose it when the recipient accepts a document containing the print composition.
- DPI: set it according to the print's physical dimensions and the recipient's requirements; the default setting is 300 DPI.
Set the outline, partial transparency and background
Cut lines adds the area's outline. After enabling it, you can choose a color and Cut line thickness in millimeters. Padding (offset) sets spacing around the area and offsets the outline. It does not automatically extend the artwork beyond its boundary.
Remove semi-transparent pixels is useful when the file needs a sharp transition between print and transparency. It changes semi-transparent pixels into fully transparent or opaque pixels. It can affect soft edges and shadows, so review the result before production.
Add background color includes the selected product variant's color within the print area. Leave it disabled if you need transparent artwork. The 3D scene background and interface images are not the production file's background.
Download a file or a set of areas
Click Download and wait for the export to be prepared. For one result, the browser downloads a single PNG, SVG or PDF. For several areas, you receive a ZIP archive with separate files whose names refer to the design and area.
Open the downloaded files and check that all surfaces are included, the print boundaries and background are correct, and the selected size matches. If you need files for another product size, switch it in the design and export again.
- Check the current product size and layer selection.
- In Printing manager, select an area or all enabled areas.
- Set the format, DPI and the required outline and background options.
- Click Download, extract the ZIP if one was created, and review the results.
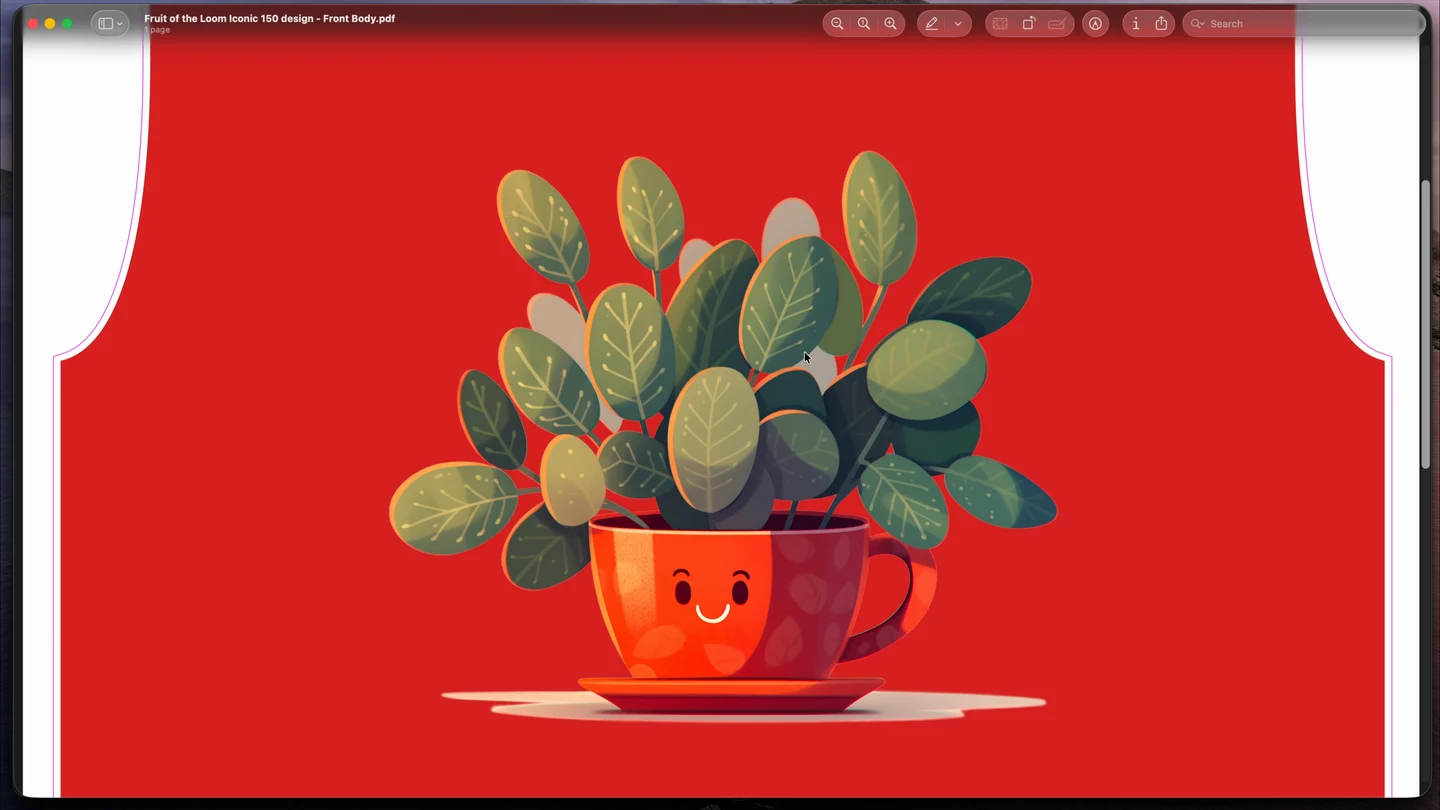
Connect POD to a WooCommerce product
You prepare Printify or Printful fulfillment in WordPress administration. Connecting the provider, choosing a catalog product and mapping variants determines which data and print areas Designer receives.

Choose a catalog product and print shop. Connect variants and print placements to the design to prepare the correct production files.

Assign a catalog product, match variants and use print area data to configure the files for the order.
Add and test the provider connection
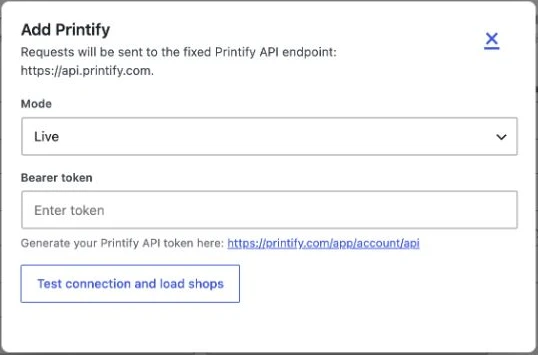
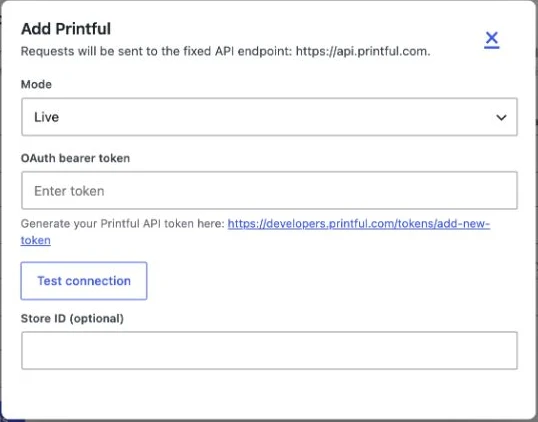
Open Alter Product → Settings → Print on Demand. In Provider connections, select Printify or Printful and use Add provider. In the connection dialog, enter the access token and choose Test mode or Production mode.
For Printify, choose Test connection and load shops, then select a Printify shop. For Printful, use Test connection and enter a store ID if needed. Finish with Save connection. The provider becomes available for mapping after a successful test and saving the configuration.
- Go to Alter Product → Settings → Print on Demand.
- Add your provider and enter its token.
- Test the connection. For Printify, select the shop returned by the test.
- Save the connection and open the WooCommerce product editor.
Assign a catalog product and print provider
In the WooCommerce product editor, open Product data → Print on Demand. Select the Fulfillment provider and choose Save POD profile. Then assign the matching product from the provider's catalog.
For Printify, open the catalog, choose a product, then use Open providers to select the print shop that will handle production. Save the product catalog. For Printful, choose a product through Open catalog and save the product catalog; this workflow has no separate print shop selection.
Mapping connects an existing WooCommerce product to an item in the provider's catalog. Check that the selected model, its available colors and sizes match the product you offer in your store.
- Printify: Open catalog → product → Open providers → print shop → Save product catalog.
- Printful: Open catalog → product → Save product catalog.
Connect sizes and colors to the provider's variants
Go to Product attributes and choose Import POD attributes to WooCommerce product. This fills or replaces size and color values based on the selected catalog. Review the result before continuing the setup.
For a variable product, go to Variations. If WooCommerce is missing combinations, use Generate missing variations. Then choose Load variants for mapping, check the assignment of each offered size and color to a POD variant, and click Save changes.
Check selling prices and other listing details in WooCommerce. This step maps variants; it does not automatically set store prices according to the provider's price list. After changing the catalog product or print shop, prepare the mapping again because previous variant assignments are removed.
- Save the POD catalog selection before importing attributes.
- In Attributes, import the required sizes and colors.
- In Variations, generate missing entries if the product will be sold in variants.
- Load variants for mapping, check assignments and save changes.
- Check variant prices and availability in the WooCommerce listing.
Prepare and save POD production files
After mapping the product, open its linked design in the administrative WordPress editor. Assign the design's areas to the provider's print placements, then generate files in Printing manager. The saved set will be needed when handling the order.
Connect a design area to a print placement
In Printing Areas, select the prepared surface and click Print on Demand settings. At the top of the dialog, check POD, Product and Print provider. This data comes from the WooCommerce product mapping.
In Placement, choose the provider's print placement, such as front or back if available in the catalog. The table shows area assignments, print size and export parameters. Move between its rows to prepare the surfaces you need.
One placement from a given provider cannot be assigned to another area at the same time in this configuration. To move an assignment, first set Not selected for the previous area and apply the change.
Adjust the area and size range
Set for all sizes is enabled by default. Leave it selected if the assignment and adjustments should apply to the sizes you offer. Disable it when working only on the current size.
Set proportions adjusts the area's dimensions to the POD placement's target pixels and DPI, taking product calibration into account. It preserves the area's position and rotation. After using it, check that the print is still in the right place on the model.
Set shape changes the boundary to a rectangle while preserving its current position, rotation and visual size. Use it when preparing a rectangular export area. Then review all required sizes and confirm the settings.
Choose the format, background and visualization
In Mockup, select Front, Back, Default or No mockup. The visualization helps you check the finished product and is saved as a separate preview file. The print file remains a separate production asset.
Expand More to set Format, DPI, Include background and Note. The format list depends on the provider and its catalog. Printify's quick edit offers PNG and JPG; JPG does not preserve transparency. Choose dimensions and DPI for the selected print placement instead of assuming one file size fits every product.
Click Apply and save the design after preparing the areas. These settings determine the parameters for the next file generation.
Generate files in Printing manager
Open Printing manager → Print on Demand. The list includes active areas with a POD assignment. Each shows the provider, Placement, target pixel dimensions, DPI and format. Select the areas for which you want to prepare files.
The Quick edit POD settings icon lets you adjust the format, DPI, mockup choice and background inclusion. Once the settings are ready, click Generate POD files and wait for generation and saving to finish.
If the product has several available color variants, Generate POD files (all colors) may appear. This button processes the colors in turn and restores the previous selection. It does not automatically export every size and is not shown when editing a specific order item.
- Open the saved design through WordPress administration.
- In Printing manager, go to Print on Demand.
- Select the areas with correct POD settings.
- Adjust the options through quick edit if needed.
- Click Generate POD files and wait for the set to be saved.
Check the saved set before fulfillment
In Printing manager, Saved POD file sets shows the prepared results. Check the date, print placement, format and dimensions. Use Open file to view the print and mockup. You can delete a set you no longer need.
In the WordPress plugin, files are also available in Generated POD files for the relevant product or customer design. Use Browse files and check that the set belongs to the correct composition and variant. Mockups help assess appearance; print files are sent for production.
After changing graphics, area boundaries or export settings, generate and save a new set. Saving the design alone does not update previously generated production files.
Submit the order for fulfillment and check its status
You handle POD orders from the linked WooCommerce order. First check the variant, recipient and saved files, then submit manually. Customer personalization, file generation and order submission are successive stages of the same workflow.
Prepare files for a specific order item
Open WooCommerce → Orders and select an order containing an Alter Product product. At the relevant item, review the POD fulfillment data: product, variant, quantity and provider. For personalization, check the design saved for that order item.
If the required files are not ready yet, open the item's design in the administrative editor, check the composition and generate a set through Printing manager → Print on Demand. After saving, return to the order and choose Browse files.
Also check the recipient details. The plugin first uses the WooCommerce shipping address, then a complete billing address. The fallback recipient address in POD settings is used only when the order lacks a complete address; it is not a Printify return address.
Check the data and submit the order manually
Use Request payload preview in the fulfillment panel for the item. It lets you review the prepared data and validation result before placing the order. Correct any missing mapping, files or address details.
After checking the data, choose Submit POD order in production mode. This is an action performed by the administrator. Paying for a WooCommerce order does not by itself trigger submission to the provider.
With Printful, submission confirms the order for fulfillment, so treat this button as a real production order. With Printify, you also submit the order to the provider; check its status in the history afterward.
- Review the saved files and make sure they match the ordered personalization.
- Open Request payload preview and check validation, variant, quantity and recipient.
- In production mode, choose Submit POD order.
- Check the created order's ID and status in POD order history.
Handle several items in one store order
For orders containing several items, Combined order payload preview and Submit combined order are available. First check each product's files and mapping, then review how fulfillment is split.
The plugin groups items by fulfillment configuration, including provider and print shop. One WooCommerce order can therefore create several orders with providers. Check statuses and shipments for each group.
Refresh the status and shipment details
POD order history contains the local ID, provider ID, status and available tracking information. After submitting the order, use Refresh provider status to retrieve current data.
Refreshing is performed with a button. Check the returned status and tracking, and manage the overall store order status in WooCommerce. This lets you track the customer design, saved files and provider fulfillment progress separately.